How to sew a quilt with your own hands
The quilt is a kind of greeting from childhood, a symbol of comfort and warmth. It does not lose its popularity, continuing to be actively present not only in the interior of the bedroom, but also in the living room. And in general, the technique of combining fabric elements today is used in any home needlework. How to choose a scheme for tailoring a quilt with your own hands? What rules should be guided by thinking about this process?
How to sew a quilt with your own hands?
Non-elastic and not too thin fabrics are often chosen for such a product, and it is important to pay attention to their colors. If there is an active pattern that fills almost the entire space, it should not be on all patches - 1/3 is enough. The rest of the better to put neutral, monochrome options. For a children's quilt with their own hands, young mothers often acquire cheerful, bright fabrics, but the harmony rule also applies to them. They can become the basis of the front side, but then between these patches there should be gaps from single-color materials of natural or pastel shade.

- Regardless of whether you select thematic drawings, or simply compose the existing cuts, a kind of "assorted", you should consider the general appearance of the product. Draw a complete quilt pattern and lay out the materials on it without fixing them: just look at how the selected pieces fit together. There are no clear rules here, but professionals advise first to distribute neutral elements at equal distances from each other, and only then to put accents.
- If we talk about texture, then beginners are recommended to use materials similar to each other: either completely glossy or fully matte. For a trial product you should pay attention to chintz, calico, cotton. In addition to the fact that they are easily combined, they have an average density and do not slip under the hands and foot of the machine.
- An important nuance is threads. In order to sew the patches together, you usually take neutral shades (black to dark, white to light), but if you wish, you can additionally take a contrasting tone, which at the final stage you stitch the front layer. They can also perform the edging of the edge of the finished blanket.


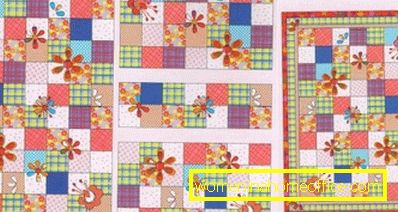
- As for the options for combining elements, as well as the choice of their original form, everything depends on your imagination. A classic patchwork quilt is, of course, made up of a large number of identical squares. However, they can be replaced by rhombuses and triangles, rectangles and other geometric shapes that have corners. Working with circles and their derivatives is much more difficult.
- It is noteworthy that the details do not always remain flat - you can cut and sew them in the Oreuno technique: when folds are made on the flap, for example, diverging from the center to the periphery. The only thing that the fabric in such a situation will take more than with classical technology.


The most important point - the choice of a suitable scheme. A quilt is created with your own hands in a matter of hours, if you know exactly what algorithm is used to join the prepared pieces. You can choose absolutely any drawing, guided by the above options and composing them at your discretion. And for trial work, you can take the most simple chess pattern: after you understand the features of sewing such a product, you can experiment with lines and directions.
Step-by-step instructions for beginners
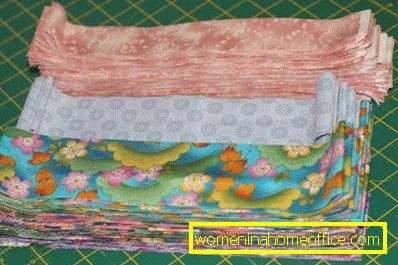
First, open the fabric: the blanket is made up of 2 parts of the same size - this is the bottom pad of a single piece and the top composite. There will be a synthetic winterizer between them: it is not recommended to stuff a quilt, as this may make its surface uneven and thereby distort the selected pattern.
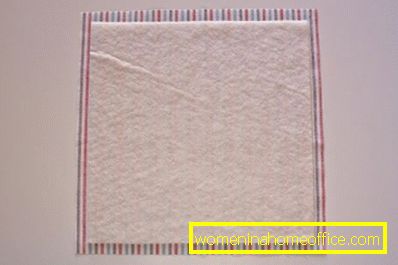
- The square (or rectangle) of sintepon should be 2 cm wide and shorter than the main square / rectangle of the lining. These 2 cm are split in half and thus form a flat frame 1 cm wide around the padding polyester. It is recommended to stitch together these layers according to the “snail” principle, but without rounding: the line goes from the middle, through twisting, reaching the edge. The distance between the stitched sections is desirable to keep the same.
- As for the upper piece of fabric, the flaps, of which it will consist, need to be cut, taking into account the seam allowance. For example, if the width of the blanket is 70 cm and is 7 flaps, then the width of each of them is not 10 cm, but 14-15 cm. The same is calculated for the length of the product and parts.
- Be sure to draw the inner contour on the wrong side! If you just cut the squares of 12 * 12 cm, remembering that the finished parts will be 10 * 10 cm, and 2 cm - seam allowance, the line made by the eye will be uneven, and the entire pattern of the front layer will be lost.
- Before you start combining patches, do not forget to process each of them around the perimeter with a zigzag stitch or on an overlock. If it turns out that the seam allowance is minimal, you can burn the edges - they will still be inside and will not give undesirable relief, because the material on the blanket is chosen rather dense.
- Finally, iron each piece - so they will lay down as smoothly as possible.

Now you can proceed to the procedure of sweeping and sewing. Professionals assure that if the fabric is not elastic, you can do without even pre-connecting the parts - chop them up with English pins and immediately send them under the presser foot. But if you are working with a similar product for the first time, for a more accurate result, first make manual seams.
- Fold the 2 flaps facing each other, stitch along one side and unroll. Add a new flap and draw a seam parallel to the one already made. With this technology, add details until a strip is formed equal to the width or length of the blanket. Professionals advise working with such "levels" - it is much easier for a beginner than to sew 4 squares into 1, then add 12 more squares to the perimeter, etc.

After the front part is ready, all that remains is to combine it with the lining, on which the synthetic winterizer is already sewn. Do not forget that the line along the perimeter is not finished at the starting point, but a little earlier, so that the opening for the blanket eversion out is left: it is already closed manually, with a secret stitch.
- If you want to make a highlight, you can make some square patches composite. Calculate the dimensions of the square (for example, 10 * 10 cm), divide it into 3 vertical stripes, each of which is 1 cm wide by 1 cm as an allowance for the seam. There will be 3 stripes 5.3 cm wide each, which are stitched together longitudinally, making a square. There should be few such patches, as they are accents. It is recommended to have them in 1 row in each row: both vertical and horizontal.

To make a quilt look complete, it can be quilted: this will emphasize its main feature - the abundance of parts that are folded into a whole. It is recommended to do this before the front side and the lining are sewn, since the latter does not need decorative stitches along the lines of connection of the elements.
In conclusion, it is worth emphasizing that making a quilt with your own hands is very simple. The only thing that needs to be monitored is the seam lines, since the geometric shape prevails here. Otherwise, the technology is ready to submit even to a beginner in needlework, so be sure to try to decorate your house with such a product.