Plaid of pompons do it yourself step by step
In the house where the woman is keen on different types of needlework, there is always a pair of hanks of inconspicuous yarn. Do not rush to throw out not too beautiful looking threads. Consider how to make a blanket of pompons with your own hands step by step.
Craftswomen tips

With the help of your own hands, if you wish, you can find an incredible array of training techniques for creating a rug from pompons. Such household products knit with needles, weave on a frame or luma, even use a special base fabric. Finished products are incredibly soft and fluffy.
At first glance, everything looks extremely simple. But in fact, have to work hard. A few simple but effective tips will help ease your work:
- If you weave a blanket on a wooden frame, so as not to wind one thread each time, collect the yarn in several layers at once and only then apply it to the luma.
- First, the base should be applied, approximately 30 threads, and then the pom-pom yarn itself. By the way, you can take it in a contrasting color.
- When all the threads are stretched and the knots at intersections are tied, do not rush to remove the plaid from the frame. First, look carefully if you accidentally missed a few knots.
- Cut pomponchiki need very carefully, so as not to damage the lower layer of the base, otherwise the blanket just disintegrate and nothing happens.
In words, everything looks pretty simple, right? How the work will actually be, depends largely on your patience and perseverance. To begin, let's try weaving a plaid of pom-poms with our own hands through one of our workshops.
Create a fluffy plaid
Before you start working, you need to decide on the quality of the yarn. Masters recommend the use of threads with acrylic - so the blanket is very soft and hypoallergenic. And how to make a blanket of pompons with your own hands, tell our step by step guide with a photo.

Necessary materials:
- wooden frame;
- wool threads;
- scissors.
Process description:
- Install the frame as you wish: horizontally or vertically. Then fold the yarn into several threads. It is better and more convenient to wind it when there are 5-7 threads in the hand at once.
- Begin to wind the yarn on the machine from top to bottom, simultaneously grabbing two nails at the same time. As soon as you reach the end, flip the thread perpendicularly and continue winding the same way horizontally.

- If you work at once with threads of several shades, then start with a yarn of the main color. Then make the second contour a contrasting shade.
- When all the yarn is wound on the nails, the most painstaking and long stage begins. Now you need to gently turn the machine and tie all the crossed threads with a small piece of residual yarn.

- To make the pompons, which will be the basis of the rug, it is necessary to cut the threads exactly in the middle between the intersections with small scissors. It is most convenient to begin work from the central part of the canvas, while at the same time you need to leave several threads intact at the very base.
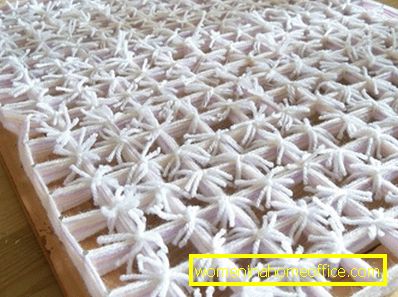
- When all pompons are cut, the blanket must be carefully removed from the frame. Now cut the tassels in half and, if desired, thread the beautiful satin ribbons at the base.
Weave a colorful children's plaid
No mommy or grandmother's needlewoman will never leave her children without original creative gifts. And if there are already enough different sweaters and hats, try using your own hands to make a children's rug from pom-poms on a mesh basis. If you sew on the wrong side of a piece of fabric, then they can completely replace the blanket for the stroller or use it as a play mat.

Necessary materials:
- yarn of different colors;
- scissors;
- soft mesh base.

Process description:
- To begin with, lay out the mesh base on a flat surface and measure the required height and width with a ruler. Carefully cut the desired piece with scissors.
- Grab a small piece of yarn and start winding it around your fingers while gently holding the tip.

- Do not forget to keep some distance between your fingers while winding the threads so that the yarn does not sit too tight on your hand.
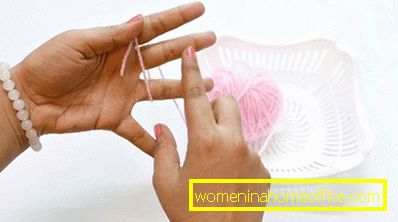
- If you want to get a medium sized pompom, wrap the thread around your hand 55-60 times.

- Now carefully remove the yarn from your hand and place it on the table. Measure out a piece of the same color about 20 centimeters long.
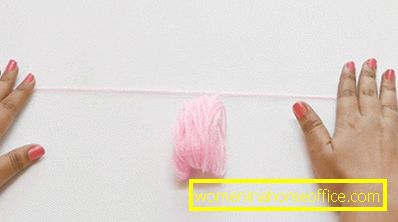
- Wrap the thread around the center of the yarn to divide it into two equal halves, and tie the ends into a knot. In order for the yarn to be well fixed, make 3-4 turns.
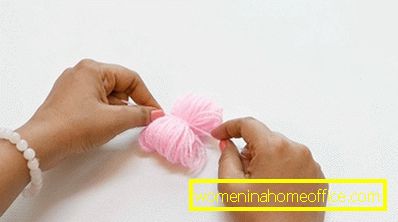
- It should look something like the photo below. Do not cut off the long tips of the thread, as they will still be useful to us in further work.

- Now take sharp scissors and carefully cut the loops on both sides.
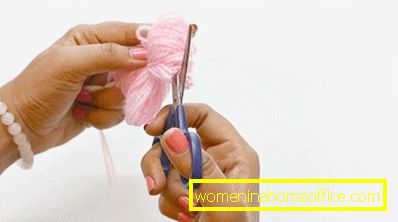
- Trim slightly protruding threads to give the pom-pom a regular shape.

- Do the same with the yarn of other colors and form as many pompons as required by the size of the base.
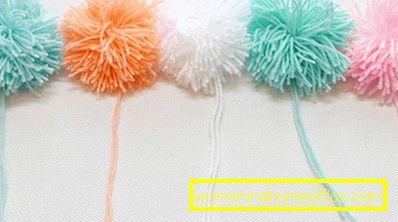
- Now take the first pompom and gently push the thread through the mesh holes, tie the edges with a tight knot on the wrong side.
- Use scissors to cut off the excess part of the thread so that the pompom holds tight and does not move, and the yarn does not interfere.

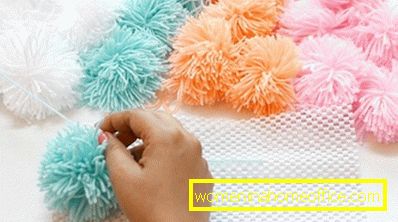
- In the same way, attach pompons of other colors to the first row. Try to place them as close as possible to each other, but so that they do not deform.
- When you finish the first row, go to the next line, but begin to tie the pomponchik so that the colors do not repeat.

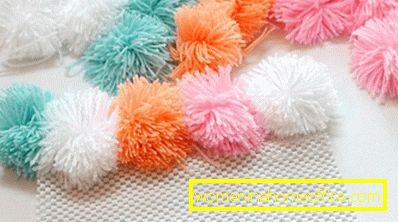
- After you are done, turn the blanket inside out and check if all the threads are trimmed.

- Now a beautiful soft blanket for games is ready. At will on a seamy side it is possible to sew a piece of fleece fabric.
Here such soft and bright plaids can be made with your own hands, having spent on their production only a few hours. You can diversify the proposed examples by decorating products with satin ribbons, bows or golden threads. The main thing in this business - the imagination and sleight of hand.