Origami from triangular modules. preparation of basic
Modular origami is the most difficult section in this art of paper crafts. But the appearance of what is performed in this technique easily covers all the difficulties associated with it. There are many schemes for beginners, where you can hone your skills.
Preparation of basic elements
In modular origami, the main difficulty is not so much the process of adding together the individual elements and their subsequent composition, as the need to make a large number of parts. Even on a small crafts more than 100 triangles are spent, and in large compositions the score goes to 1000. Therefore, it is highly recommended for beginners to practice adding the basic modules before starting to make a large batch of them for a specific piece.
Paper for modular origami can be used almost any: from color to newsprint, magazine, etc. The main requirement for it is flexibility. The sheet should be easy to fold and hold the resulting shape, so too dense do not fit. Their size is chosen arbitrarily, where it is more important to maintain the aspect ratio of 1: 1.5. The most commonly used rectangles are 53 by 74 and 37 by 53 mm. If there is no experience in working with triangular modules, it is better to take a larger size: otherwise it may be difficult at the final stages of adding up the details.
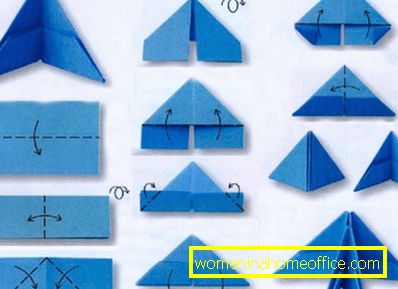
The manufacturing scheme of the base element will not cause difficulties even for a child. The rectangle is located horizontally, after which it is bent in half along the longitudinal line. The next step is to mark the middle line, for which the paper is bent along the vertical axis and unbend back. For a better effect, you can repeat the place of the fold by holding the back of the scissors blade over it.
Now the edges of the rectangle are bent inward and downward, along the diagonals emerging from the top of the intended axis. After the addition of the edge must touch each other with their outer sides, and the resulting figure will resemble a triangle, planted on a rectangle.
Further, the figure turns around with the seamy side, the outer corners of the parts looking out from under the triangle are bent inwards and upwards along the diagonal. They should lie down so as not to overlap the base of the triangle, but to align with it. Then, along the line of this base, the entire lower part, peeking out from under the triangle, bends upward, stowing on it.
And at the final stage, the module is folded along the vertical axis outlined at the very beginning. In finished form, it has sharp corners and "pockets" on the outside, near the bend.
Learning to make a vase
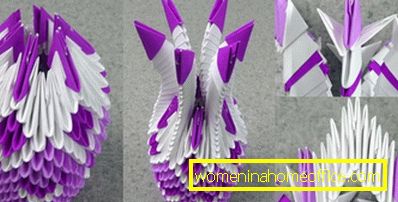
- Beginners are encouraged to try their hand at the most simple crafts: for example, vases of triangular modules. Often, the overall shape of the product does not undergo any special changes, and the main factor for varying its appearance is the pattern, which is laid out with modules of different colors. The low sculpture accounts for about 1,220 elements, which will be approximately 32 rows in height and 48-50 modules for the widest part. Calculate a specific number of parts can be, if you pre-make a sketch of a vase pattern. For example, perform the 4 lower rows in a single color, and add diamonds for the next 5, whose width and height will be identical - 3 modules each. It is possible to add a frame to them, and also to begin to spread them not from the 5th row, but from the 1st.
- To lay the foundation, 48-50 modules are connected in a circle. This happens as follows: 2 triangles are placed next to each other, their lateral sides are mirrored, and adjacent angles are inserted into the "pockets" of the 3rd triangle. According to this scheme, all the elements are connected, and the resulting chain closes at the right moment. The row that will be located on it is created by instructing new modules on the lower ones; in the case of a vase, it is necessary to move the parts out slightly in order to gradually expand the shape of the product. When you need to go to the narrowing, the modules, on the contrary, will wind up slightly inside. In total, 18-20 rows are needed on the pot-bellied base of the vase, after which the neck can be removed.
- Since this part of the vase is supposed to be narrower, the number of modules in the ring is reduced by 2 times, and therefore a new circle is laid. In height will be 13-14 rows, which are laid out already through the narrowing and expansion to the top. Kayma can be issued separately, for example, putting the modules on its side and fixing it with glue. The neck itself is also required to be put on the glue, since it will not be possible to fasten it with a classic putting the modules on each other.
- If you want to get a more original shape of the product, you can modify the neck and even fix it immediately on the base of the vase. To do this, every 7 elements on the last top row are put on the modules, positioning so that there is no shift either in or out. These tops need to be repeated 2 more times, putting them on the module. The result will be 6 protrusions that already have 3 single rows. They should be extended to the desired height, not forgetting to display a concave shape. Depending on the size of the vase, the number of modules mounted on each other will be calculated.
- At the final stage, a border is created, connecting the disconnected neck lines into a single neck. A corner of the new module is inserted into each upper triangle from under the bottom so that the free corners are left to the sides. The sides of additional parts will be attached to them, and from above they will be fixed with the triangles which are put on them. So stretch the "bridges", which form the hem of the neck of the vase. If you wish, you can add another 1 row of modules on them, securing the result and increasing the width of the finish.
Beautiful swan in origami technique
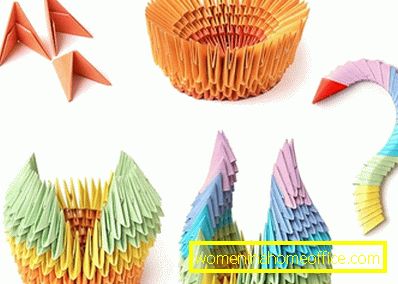
Those who have mastered the basic scheme of the vase can try a more complex sculpture - the swan. It takes about 700 modules to complete, the number of which varies depending on the height of the craft. The row, which is the base, contains 32 modules assembled in a ring. The next 6 rows line up with a tendency to expand, but the number of elements remains unchanged.
A new stage - a smooth transition to the swan neck, which will take only 2 modules in width: this zone does not need to be touched, continuing to spread up the rows. From it in both directions it is necessary to start up 13 modules, which will become the bases of the wings. Their height will be 13 rows, each of which in width will decrease exactly by 1 module to the left and to the right. Thus, the wings to their top narrow as much as possible, and it is advisable not to forget to create a natural curve for them, shifting the parts in and out.
From the side opposite to the head zone, the tail is lined up with the same narrowing up: since only 4 modules are given to it, the height will be equal to the same figure and it will be short. Swan neck can have any height, because it does not change the width.
Origami from triangular modules: schemes and ideas
If you can already easily make more than 1 thousand modules, and simple creation of a narrowing and expanding ring series of difficulties does not deliver, an immense field of activity opens up before you. Schemes for modular origami invented a lot. Those parts that cannot be connected by simply inserting the elements into each other are fixed by means of a glue gun. The rest of the difficulties with the work there.
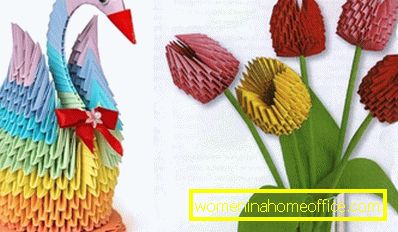
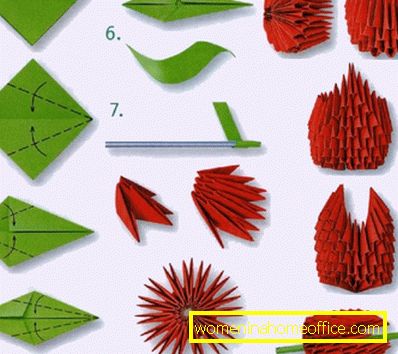
Charming tulips will be a worthy filling for the vases of modules discussed above: the heads of the flower consist of 7 rows of 14 elements each, and 2 petals are narrowed down over 4 rows. The stem and leaf are created from ordinary colored paper using the technique of classical origami.
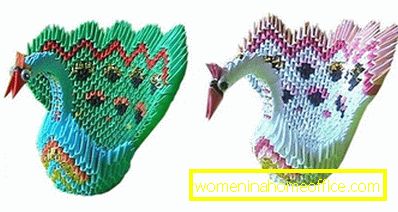
By analogy with a vase and a swan, luxurious peacocks are created, in which, after 6 uniform rows, 34 modules in the 7th 10 are separated to narrow in the chest and neck, and the remaining 24 gradually expand upwards to form a fluffy and colorful tail.
Be sure to try some simple origami crafts from triangular modules. Despite the large time costs, it is very interesting. Especially if you do it with children!