How to draw lily of the valley
Many art school teachers believe that learning to draw can be anyone. The main thing is to master the technique, to show perseverance and attentiveness. Learning to draw is worth the colors. You will not only fill your hand, but also get a drawing that can be used as a gift or to decorate a house for them. The best way to start learning from drawing lily of the valley.
How to draw lily of the valley in stages?
For starters, you should carefully look at the flower. To do this, use any image or a real bunch. Lily of the valley has long leaves, tapering at the top. Along them are embossed stripes. Remember that when drawing it is not worth drawing too much foliage. In nature, each bush plant covers from 3 to 6 leaves. Also pay attention to the inflorescences. They usually look like small cups with curved, wavy edges. On the branch there are about 10 flowers. Some of them look like small round buds.
After the preparatory stage, prepare the necessary tools for drawing and choose the technique for performing the drawing. Most often, lilies of the valley paint with watercolors. This allows you to pass on the fullness of the plant - airiness and weightlessness. Also, the flower can be drawn in the usual or colored pencils, ink and gouache.
Lesson for beginners


It is best to start training with a monochrome pattern. Thus, you should spend less time fulfilling the leaves, which consist not only of green color, and buds. It is also worth trying to draw a single lily bush. Only after this they go to the bouquets.
- Take paper for graphics. You shouldn’t buy watercolorists, they are not intended for drawing with a pencil.
- Mark the boundaries of the future image. To do this, you can draw horizontal and vertical lines that form a rectangle at the intersection. Inside the figure we will draw a lily bush.
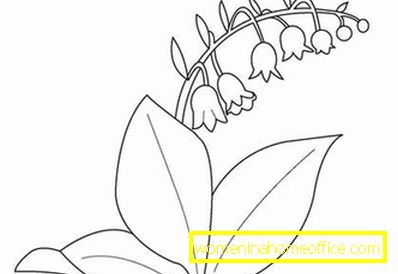
- Go to the drawing of the flower. To do this, in one of the sides we draw 3 arcuate lines, which have a slight slope. All they are stalks with flowers. The closest line is thickened. It should taper above.
- Let us execute the leaves. To do this, hold another 2 lines. Remember that in lilies of the valley foliage narrows at the top. Also, for plants, a peculiar bend is typical. Total leaves should be 3. Place them in different places. It is also worth making these parts of the flower of different sizes, because Symmetry is very rare in nature. Give leaves of lily bends.
- We return to the stalks. The 2 remaining lines are thickened. They should be like stems. On each draw 10 circles. From them we form inflorescences. To do this, draw a wavy edge at the bottom of the circles. On both sides, it should rise slightly upwards.
- Visually inflorescences of a lily of the valley are similar to sleeves small lamps. Try to make so that they looked at the different parties. In some places below it is worth tracing the inside of the flowers. Connect them to the stem with small process lines. Also, in the upper part of the stem, trace the unopened buds.
- Sketch lily of the valley is almost ready. Use the eraser to remove all unnecessary lines. Then take pencils of various degrees of softness. This will help give the plant volume and make it more realistic.
- Mark the shadows. They will be located on the bottom of the leaves and inside the inflorescences. They should be made with a softer pencil. The direction of the hatching can be different. For example, cross-wise. Next, with a hard pencil, we perform penumbra. Leave the lightest spots of the lily of the valley not painted over.
- The same effect can be achieved with the help of the Blackbird. With its help, the volume of the finished sketch is given according to the same principle - black colors over shadows, less dark ones - the rest.
Learn to draw lily of the valley in color
Also lily of the valley can be made in color. Of course, the best option is watercolor. You can also use colored pencils. Begin to perform such a drawing using a sketch with a pencil.

You can shorten the drawing time and make a stylized lily of the valley. To do this, immediately draw an extended sheet. Then draw a line for the stem. The inflorescences begin to draw the upper arcs, and not from the circles, as before. At the bottom is made of a wavy edge. Connecting them with a line. Along the finished leaf lily draw lines that are a bit at an angle. Bush lily ready. It remains only to paint. If you have decided to do this with colored pencils, then act the same way as when drawing with a simple pencil. Remember that the outer edges in some places should be done stronger and brighter. This will help to visually make a drawing three-dimensional, bringing some parts closer to the viewer.
Usually this effect can be achieved using pencils of several colors. For leaves are taken green, yellow and blue. Smooth lines underline dark places. Then the drawing is shaded with a napkin or cotton wool. To enhance the effect, you can use ordinary water. It is necessary to hold a wet line in the line.
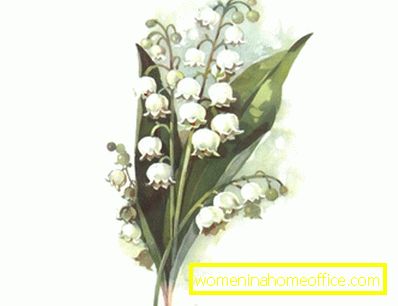
A little differently lilies of the valley are made in watercolor technique. The main task is not to overdo it with paints. Watercolor is always diluted with water. Due to this, the output is obtained transparent air shades. To draw lilies of the valley is to use the technique of raw. It lies in the fact that some of the places are moistened with water. Remember that this can only be done on special watercolor paper! Water should not go beyond the sketch. Otherwise, the picture will flow and lose its shape. It is necessary to paint wet areas. You will see how beautifully the shades begin to blur. When drawing, use all possible colors. Due to the refraction of the rays on all visible objects, you can see many shades. Lily of the valley leaves will be bluish-greenish in the shade. In the world, spot the presence of a yellow tint. The same touches the flowers of the plant. In the shade, white lilies of the valley take on a bluish tint.
After applying the primary colors in the technique of raw need to wait for the drying of the picture. If something is done wrong, the paint can be washed off with a stream of water. After drying, the finishing touches should be applied - underline dark places.
Useful videos
In order to understand how to draw a lily of the valley, you should carefully examine the plant. The easiest way to draw nature. Usually drawing begins with a sketch in pencil. It is necessary to draw the arc-shaped stems of non-constricted over-arms. Remember that the number of the latter can be from 3 to 6. Arrange open flowers and buds on the stems. The flowers of the plant resemble small lanterns with a wavy edge.