Pineapple topiary
In ancient times, topiary was called gardens with plants, the crowns of which had bizarre forms. Such plantations were especially popular in Europe in the 16th - 18th centuries. At this time, gardeners often trimmed the crowns of trees and plants in the form of people, birds, and animals. Today, topiary is a decorative artificial tree that fits perfectly into any interior. It can be made of any available materials, for example, cones.
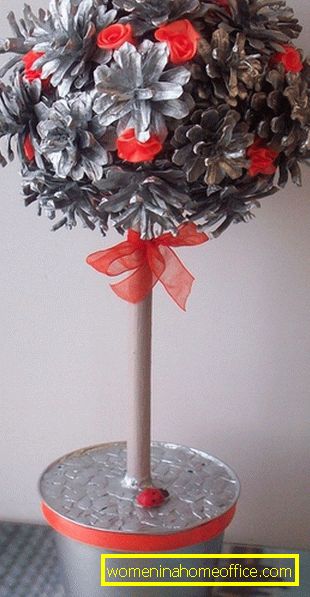
A simple master class for beginners

You will need:
- Cones;
- Cardboard or foam;
- Glue gun;
- Paint spray brown;
- Decorative pot;
- Decorative items.
Instruction:
- First of all, make the basis for the future Topiary. It is a cone-shaped shape and is formed from foam or cardboard. Just roll the material in the form of a cone. Then, paint it brown. Now prepare the cones: cut a few scales at each base, making it flatter. It is necessary to cones lay flat surface.
- Starting from the top of the base, glue the cones, minimizing the space between them. They do not necessarily take the same size: asymmetry will look more at ease and interesting.
- Now it remains for you to install the topiary in a decorative potty side, and point upwards. You can decorate the ready topiary at will, using ribbons, bows, beads, toy figures of birds and animals.
- Having mastered such a simple way to create a conical topiary, you can easily create round, square, oval and figured crafts.
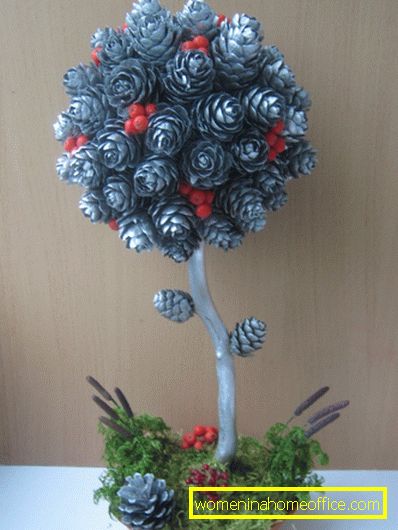
How to make with your own hands topiary of cones?
You will need:
- Cones;
- Decorative conifer branches;
- Branch for the trunk;
- Newspaper or paper;
- Masking tape;
- Brown paint;
- Glue gun;
- PVA glue;
- Scissors or knife;
- Twine;
- Sackcloth;
- Flower pot;
- Gypsum;
- Pebbles;
- Decorative items.
Instruction:
- Start creating a topiary from the crown: just crumple the leaves of paper or newspaper, forming a ball. Paint over the finished ball with masking tape and paint with brown paint.
- Wait for the paint to dry, then, using scissors, make a hole, pour glue into it and insert a thick stick.
- Wrap the barrel with string, gluing it at the beginning and end of the barrel. Starting from the crown, attach the bumps to the base as closely as possible to each other. In the gaps between the cones glue the twigs.
- Wrap a pot with a burlap and secure it with a glue gun. Pour the plaster into the pot, insert the barrel and wait for it to dry.
- When the cast completely hardens, pour glue into it and attach the pebbles. Decorate the pot with topiary twine and decorative elements. If you wish, you can add crown itself with interesting elements: beads, sparkles, bows, flowers, etc.
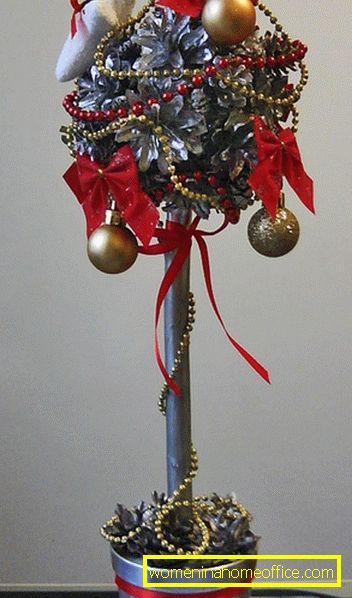
New Year Topiary
You will need:
- Cones;
- Pine or fir branches;
- Newspapers;
- Threads;
- Brown or green paint;
- Small Christmas decorations;
- Tinsel;
- Decorative pot;
- Wooden, plastic or cardboard barrel;
- Gypsum;
- Scissors;
- Glue gun;
- Twine and burlap;
- Satin ribbon;
- Beads;
- PVA glue.
- Vata;
- Artificial snow and sparkles.
Instruction:
- Roll up a newspaper from newspapers, wrap it with threads, paint it with brown or green paint. Make a hole in the ball, pour a little glue and insert the barrel. You can wrap it with ribbons or twine, decorate with tinsel and beads. Cover the crown of the future topiary with cones. Pour plaster into the pot, place topiary in the center of the container and wait a few minutes for the plaster to dry.
- Wrap the pot with sacking, secure with twine or satin ribbon. Decorate the crown of topiary with Christmas balls and pine sprigs. You can additionally decorate with a bead garland. Decorate the pot with tinsel and beautifully distribute cotton wool over the plaster. Sprinkle finish with artificial sparkles and snow.
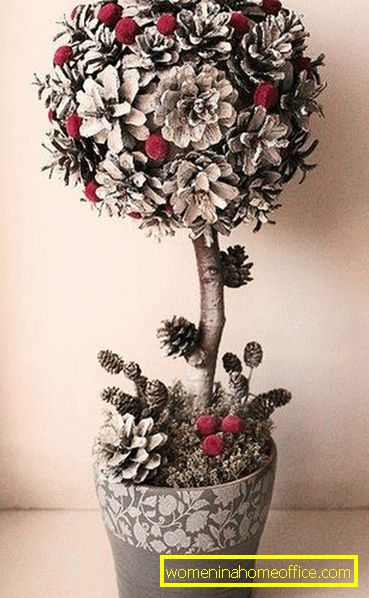
Elegant original topiary

You will need:
- Cones;
- Newspaper;
- Twine or thread;
- Gypsum;
- Flower pot;
- Dry branch;
- Thermogun;
- Wrapping paper or candy wrappers;
- Vata;
- PVA glue;
- Tinsel;
- Toy gifts;
- Moss.
Instruction:
- Wrap the newsprint in a tight even ball, wind it around with a thread. Pour plaster into the pot, put the barrel exactly in the middle and wait for the solution to harden.
- Attach a newspaper ball to the table. Now gum the crown of the topiary with cones as close as possible to each other.
- Cut the wrapping paper in small squares. Roll them up with cotton bags. Wrappers for candy are ideal instead of paper. Glue the resulting balls to the cones.
- Place moss on top of the plaster and decorate with tinsel. Put a few balls of wrappers and toy gifts. You can also put toy figures of animals under the topiary, put Santa Claus and Snow Maiden.


Topiariyiz cones - the perfect decoration for your interior. It is a ball decorated with various elements (in some cases they make triangular, square and curved topiary) fixed on the trunk. It can be of different sizes, used as decoration for home, office, summer house and other premises. To create topiary you do not need a lot of effort, time and materials. Make a handicraft can even a child. Be sure, having made the topiary yourself, you will let prosperity, happiness and good luck into your home!