How to make a ball out of your own hands
Balls always look beautiful and solemn. Therefore, they are an original and bright gift that will appeal not only to young children, but also to adults. Of course, such beauty is easy to buy, but you can also do it yourself. The main thing is to have patience and the desire to create a fabulous figure with your own hands!
Making balloons of various shapes can be a great hobby. It also helps to calm the nerves, to develop imagination and fantasy, and of course, to raise the mood, both to yourself and to your close ones. It is very easy and simple to make such figures, so even a child who is interested in participating in such an exciting game can cope with this task.
What are the shapes of the balls?


Figures can be of various sizes and shapes. More recently, only in a circus, artists could put balls of oblong shape into unusual and bizarre shapes. Today, anyone can master this skill, because the technology for creating them is very simple, and you can purchase special balls in almost any store.
Devoting just a few hours to this activity, it will soon be possible to move from small and primitive figures to real works of art. It can be chic fabulous castles, original sculptures, difficult compositions.
Today, all products from balloons are divided into multi-syllable and monosyllabic. First of all, you should study the monosyllabic modeling, where you can create incredible compositions from just 1 ball. As soon as certain skills of work appear, it will be possible to gradually move on to complex modeling.
Rules for working with balls
First of all, you need to take care of improvised means, thanks to which you can create truly unique masterpieces. It is worth remembering that only special balloons that are intended for modeling should be used for twisting. The main feature of such balls is that they differ from simple ones in their weight. If they are filled with helium, they will not fly in the air. That is why they are just perfect for twisting.
The balls can be of different diameters and lengths, while differing in a wide range of colors, and of course, the manufacturer. You will need scissors to remove unnecessary parts, a black marker, double-sided tape, thanks to which you can create more complex and original shapes.

First you need to learn a few basic rules, without the knowledge of which you simply won’t be able to do modeling:
- Always it is necessary to inflate the balls completely, the tail must remain. It is thanks to this that it is possible to get more bubbles used for subsequent modeling. The excess air that is squeezed during the modeling process will go to the tail.
- Beginner designers should stop their choice on softer types of balls. They will be much easier to compress and twist.
- It is important to remember that all twists must be made strictly one way. For example, if you first made a twist to yourself or from yourself, then you need to continue further. Also, one twist must be at least 360 degrees. Otherwise, it is just not possible to leave a knock between the individual bubbles.
- In all cases, the beginning of the simulation must begin with the head of the ball itself. Thanks to this approach, I’m near the tail there is a free space in which all the excess air will accumulate.
- Before you start inflating the ball itself, it will be imperative to pull it by the ends. Otherwise, it may inflate unevenly, and sometimes even burst completely during twisting;
- Over time, it will be possible to use special electric or manual compressors, which are used by all professional twisting designers.
Learning to make a heart and a flower
For a start, you can create a simple heart that consists of exactly 2 balls.
- We must take the red ball and inflate. In this case, approximately several free cm are left in the tail. Now it is necessary to tie its end and beginning in such a way that a ringlet is formed as a result.
- Further in the central area, where the notch for the upper part of the heart should appear, the ball should be folded so that it will acquire the correct shape. If necessary, it will be possible to twist slightly (this is done so that the ball does not return to its original state). That's it, gentle heart is ready!
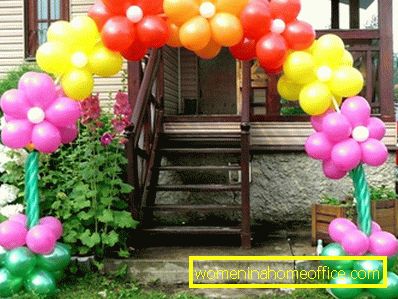
To make an interesting flower, you need to take exactly 2 balls - one green and the other red.

- First, a red ball is inflated, which will be used to create the head of the future flower (about 3 cm is left in the tail), and then a neat knot is tied.
- Further, the end and the beginning of the ball are tied into two knots, and it is bent in half, after which it is twisted in the middle 2 times. The halves that appear are further divided into 3 equal parts, and then each side is twisted together in 2 places.
- The result is the "petals" of the future flower, which are folded accordion. Now you need to take the index and thumb of one hand in the places where the twisting contact occurs. With your second hand, you must begin to twist the petals, forming a beautiful flower.
- Once the head is fully prepared, you can start creating the stem. A green ball is taken and inflated, while leaving a slightly free end so that the ball is a bit soft. From the knot on the tail it is necessary to retreat about 10 cm, then in this part the bending and twisting of the ball are performed. As a result, the knot must cross with the place of twisting.
- Next, the resulting stem is inserted directly into the center of the flower, after which it is bent and twisted until a leaflet is obtained. The resulting figure can please both relatives and friends, as well as small children, who with great pleasure will take part in its creation.
Today, the art of twisting never ceases to amaze, because having mastered only a few techniques, you can create beautiful wedding figures. For example, the arches made of balloons are very popular. They are often used in weddings decoration restaurants.
When forming shapes from balls, be patient. At first, only simple and simple figures will be obtained. Over time, developing your own skills, you can create truly original and very beautiful fairy figures. Like any creative hobby, twisting requires patience, desire, experience and certain skills.