How to draw a star
It seems to many that the star is the easiest element to draw by hand. Someone else in childhood was taught by a single line, without taking the pen from the paper, to draw a five-pointed star. But did it turn out to be perfectly smooth, with symmetrical rays? For those who want to portray a real analogue of a star from the Kremlin tower, you will have to follow a certain sequence of actions.
Five-pointed star: a simple master class
In addition to the fact that the Kremlin star has the same rays in its length, width and angle, it is also bulky. It seems that it is impossible to draw such a figure without special skills. But such an opinion is wrong: you should arm yourself with a pencil, an eraser and a compass. As well as patience, free time and knowledge of the rules of geometry.

At the start stage, a circle is drawn, the line of which should not be made too clear and bright: it has an auxiliary character, and therefore it will be erased later. The radius is chosen arbitrarily, but for beginners it is undesirable to take a value less than 7-8 cm, since it is much more difficult to draw small elements. If there is no compass, you can circle the upside-down glass or mug. Its diameter is enough to put the desired shape inside the circle.
The next step is to divide the circle into 5 equal parts, according to which points are marked on it. How to do it? The easiest option is to use a protractor. Since in a circle of 360 degrees, dividing this number by 5, you can get 72 degrees. Consequently, every 72 degrees there will be notches indicating the division of the circle.
If there is no protractor, remember the geometric method. To do this, the center is marked in a circle, from which vertical (AB) and horizontal (CD) straight lines, which are the diameters of a circle, extend. On any of the halves of these straight lines (more convenient - on the horizontal one), the middle (E) is marked, which will become the center of the new circle intersecting the upper point of the vertical straight line (C).
The radius of this circle should be put off on the other half of the circle, now making the upper point (C) the middle. The place where the new circle crosses the horizontal line will become point F. And the resulting segment CF is considered to be the value from point to point in the divided into 5 parts of the main circle.
After the circle has received 5 points, they need to start to connect with each other to get a star. Let them figuratively, starting from the top, they will get the letters M, N, L, O and P. Then the lines are drawn from M to L, from N to O, from L to P, from O to M, and from P to N: t . the points are connected through 1. As a result, the scheme of the star is in front of you, however, it is required to more clearly describe it, and also to erase the auxiliary circle. In addition, the volume of the figure has not yet appeared, but I want to get a 3D image.
For this purpose, the creation of faces begins: a vertical is drawn from each vertex, which should enter an obtuse angle opposite. After that, the eraser is deleted and the inner pentagon obtained by connecting the points. And the final touch will be only the painting of the faces to add volume: usually each ray of a star divides the light and shadow in half - its left half goes to black, the right one remains in white. Or vice versa. It is also desirable to take care of the saturation of black color, compacting it in the side that does not get the light. If you want to get a pattern of the Kremlin star, several more lines will lie on the painted edges: forming a small star in the center and rays connecting from it from its obtuse angles.
Learning to draw the star of David
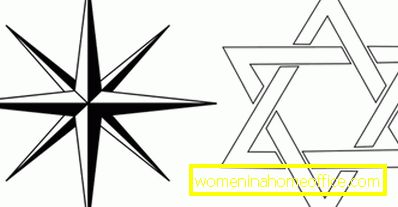
With five-pointed figures, the variety of stars does not end: in particular, the Star of David has 6 rays and is considered a religious Jewish symbol. It is somewhat easier to draw, since it is composed of 2 equilateral triangles. But is it possible to create them and arrange them ideally without paper in a cage, where it is very easy to measure the size of the faces?
As in the lesson about the five-pointed star, you can use compasses and a protractor: divide the circle into 6 parts of 60 degrees each, combine the points through each other, remove the extra auxiliary lines, and get a finished figure. And you can do otherwise, taking only a compass and a ruler, but without creating a starting circle. For this purpose, a horizontal line is drawn, the length of which is determined arbitrarily. However, it is important to understand that the exact same height is taken for free space on paper. Therefore, if the length of the line is 10 cm, then the same 10 cm remain at the bottom and at the top.
The compass solution is taken to be equal to the length of the base of the future triangle, after which the needle is placed at the end of the horizontal, and an arc is drawn down with a pencil. The same action is repeated from the other end. The point of intersection of the arcs will be the top of an isosceles triangle, whose base is looking up. Half the star is ready, but now you need to draw the same triangle with the base at the bottom. And the whole difficulty lies in its correct location.
In fact, this is easier than it seems: with a ruler, each side of the existing triangle is divided into 3 parts, so that 2 points appear on them. Inside the triangle, the points are connected to each other, and all the vertices of a large triangle become the vertices of it like small equilateral ones. It remains only to attach the ruler, extend these lines in all directions, and their points of intersection will be the vertices of the new triangle.
After removing the dashes with an eraser, a perfectly flat six-pointed star of David will remain on the paper. If necessary, exactly the same star is drawn inside it by lines parallel to the main one. Then the internal zones are erased, and a thin contour appears, or a figure without a core.
Video tutorial for beginners
You got acquainted with the drawing schemes of the most famous stars, and after practice you will be able to draw any of them in 2-3 minutes, using only 2 tools, not counting the pencil. Let this small victory on the artistic front be the beginning of a series of new, more exciting, your successes in visual arts!