Handmade cardboard boxes
For needlewomen there is always an occupation. We offer to do our own box of cardboard. Depending on the size of the box, you can put small things that are valuable to you in it: it is jewelry, and little notes, and memorable souvenirs.
Cardboard box
Boxes made of cardboard - the easiest option to create a box. Especially if you turn on the fantasy, you can get an original and beautiful thing. This box will decorate your table or serve a gift to a friend.

Required materials for the cardboard box
To create the box you will need:
- cardboard,
- glue (preferably PVA),
- scissors,
- black mascara
- form (wooden block or plastic cube),
- pencil,
- ruler,
- paints,
- brush,
- sandpaper (paper).

How to make a box with your own hands?
The basis of the box
- To make the box you need to cut strips of cardboard. The width should be 3-4 cm. You can take more, this is the height of the box.
- Wrap one strip of cardboard around the blank. Cut the extra length.
- Glue another strip on it, cut off the extra edges. It is necessary to glue the second strip so that it closes the joint.
- So glue the third strip. You can stick as many strips as you want. This will be the thickness of your jewelry box. So see for yourself how durable you need a box.
- Leave the base to dry.
- When it dries, rub the edges of the base of the emery box to make it even.
Casket lid
- Put the dried billet on the cardboard. Circle the inside of the pencil.
- Cut a few of these rectangles (or squares, depending on the shape of your box). Glue them together and let them dry well.
- Circle the base again on the cardboard, but outside. Add a few centimeters to the lid was more of the box itself. Cut a few of these blanks and glue them together. Let dry up.
- Sharpen the edges of the workpiece with sandpaper for evenness.
- Glue together the two parts of the cover. Here you have the cover and ready.

Bottom of casket
- The ends of the base of the casket are coated with glue.
- We lay the foundation on the cardboard. We wait until it dries. Cut off the extra cardboard. Got a base with a bottom.
- Now we increase the strength of the bottom. To do this, repeat the action described above: we glue the ends with glue, put them on a cardboard and wait. The excess edges of the cardboard cut on the box.
- So we repeat the necessary number of times.
- That the casket turned out symmetric. It is necessary that the number of layers of cardboard bottom matches the number of cardboard walls (base). It is important that the lid be from the same amount of cardboard or even more.
- To hide all the irregularities and better attach the bottom to the walls of the box make a strip of cardboard a centimeter higher than in the manufacture of the base. Glue on the wall, overflowing and the bottom of the box.
- Remove all irregularities with sandpaper and scissors.
- That's it, the box is ready! The lid is removable, it is not attached to the box, but is inserted into it.
Design registration of a casket
Mix 50 g of glue, 1/4 part tsp. honey and 50 grams of black mascara. Cover the box with this mixture. Let it dry well. After that, it remains to decorate the box. Take the paint and brush in your hands, turn on your imagination!

For the black box, red flowers or berries are suitable, which can be easily drawn to any person. If you are confident in your artistic talent, try to depict something more complex. It can be a person’s silhouette, a girl with a dog, a Chinese character, or just a beautiful intricate pattern. Choose whatever you like and feel free to apply the picture on the box.
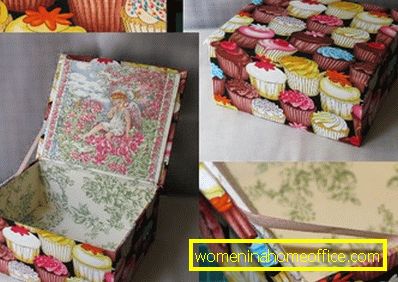
If you are afraid to decorate the box yourself, ask someone who draws well and is not afraid of it. Surely you will find someone suitable for this from friends. But better do it yourself. You can draw a picture from somewhere. And you can just cut and stick. Then you will not have to suffer with drawing. Read the article Decoupage with his own hands. Knowledge of decoupage can come in handy when decorating a box.
So you can easily and easily make a cardboard box with your own hands! You can keep it, or you can give it to a loved one. It is even better to make many such caskets of various shapes, roominess and design!
And about what other materials, in addition to cardboard, you can use to create a jewelry box, read the article Jewelry box with your own hands.