Crochet rim
Many needlewomen master the art of crochet hem. Believe me, this will be very useful in everyday life. With the help of border, you can decorate napkins and towels, process the edge of clothes, decorate interior items, curtains and more. There are many different ways to knit borders. If you are just learning crochet skills, then select the simplest schemes, then complicating the task. In our article, we will discuss how to crochet the hem. Schemes and description of the knitting process will help you create these masterpieces.
What are the types of fringe?
Crocheted hem, first of all varies in width. In addition, the border can be made in the openwork style or with strict observance of lines. Experienced needlewomen distinguish the following types of fringe:
- rim tied along;

- transverse;

- openwork;

- ribbon;

- multi-layered;
- sirloin;

- border;
- shell;
- fringed.

Crochet openwork border: diagrams and description
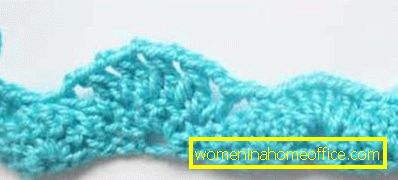
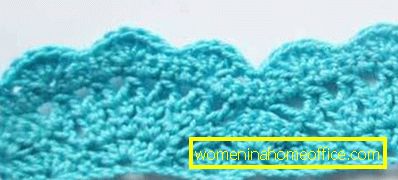
If you want to tie an openwork border for finishing towels, napkins or towels, then a zigzag pattern is perfect. Run this openwork drawing even a novice. The main advantage of knitting such a border is that the product is knitted in length, that is, in advance you do not need to count the number of loops. You can try on the border to the finished product in the knitting process.
Necessary materials:
- strings (iris, cotton or synthetic with lurex);
- hook;
- needle.
Step-by-step process description:
- First, you need to gain air loops in accordance with the required length of the rim.

- Then crocheting a zigzag edging occurs in accordance with the scheme, on which the air loops are conventionally indicated by dots, and the columns with nakida are oblong crosses.

- After a set of air loops, you should knit 4 columns with nakida, 2 air loops, 12 single columns with nakida, alternating them with two air loops. The edge of the product must be closed to make a kind of zigzag.
- Each subsequent row must be knitted in strict accordance with the scheme, alternating air loops and columns with nakida.

- All you need to tie 12 rows. Border will be medium width and is perfect for finishing home textiles.

- The finished border is sewn with a needle and threads of the same texture to the product.
Knit a wide border
The wide border can be used for finishing children's clothes or women's skirts. Depending on the chosen yarn, such a border can be a wonderful decoration for home textiles.
Necessary materials:
- yarn;
- hook;
- needle.
Step-by-step process description:
- It is necessary to knit a wide border according to the scheme, alternating columns with double crochet and without it with air loops.

- The first row should resemble a kind of fan. To get such a pattern, it is necessary to alternate between air loops of 5 columns with single and single crochets.

- In the second row you should knit three lifting loops and 2 columns with nakida, tying them into one loop. Then, a single crochet column is knitted in height of 1 row, one air loop, one double crochet column, 2 air loops, 2 double crochet columns, and 2 air loops. This rapport is repeated until the end of the knitting row.

- The third row is knit by the repeat of the second knitting row.

- In the fourth row, you should knit only single crochet columns.

- The subsequent fifth row is knit by the first row of rapport.

- Do not forget that initially it is necessary to calculate the number of loops in accordance with the length of the product to which the hem will be attached.
- If the product is knitted, the hem is sewn using the same crochet thread. Otherwise, you should use the usual thread and needle and sew from the wrong side.
Crochet edge trim: master class with diagrams
To lengthen the children's things sometimes you need to crochet the edge. Very often needlewomen tie the edges of their knitted sweaters and vests so that they do not wrap and constantly keep their shape. Let's figure out how to do it. Basically, for wrapping products choose a border "Shell".
Necessary materials:
- yarn;
- hook.
Step-by-step process description:
- To begin with air loops need to dial on the edges of the finished product.

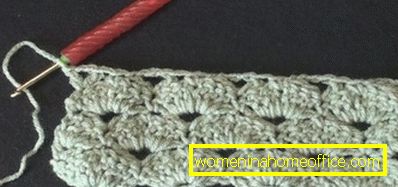
- Tie the edge of the product in the form of a shell should be as follows.

- In a single air loop should stretch a few columns with nakida.
- After performing such actions, the edge should be rounded.
- Between the shells, gaps should be made so that the number of looped loops resulting from tying up the columns corresponds to the number of loops missing.
- When knitting five columns with nakida on both sides should be knit two air loops.
- If you want to get high shells and a wide border, then the columns can be knitted with double nakida.
- The shell in the shape of a shell will be smooth and beautiful.

Knitted things are always in fashion, especially hand-made. You want to make your clothes or home textiles original, then tie them with a lace or wide border. There is nothing complicated about it. You will see, you will surely give many things a second life.