Quilling for beginners adults and children
Do you want to find an occupation that will not only allow you to relax and distract, but also enrich with new emotions and aesthetic pleasure? Then pay attention to quilling. Even for beginners, schemes with a description will not become a stumbling block in creating elegant and incredibly beautiful paper crafts.
The art of creating miniature paper masterpieces
Quilling (from the English "bird feather" - quill) originated in Europe in the XIV-XV centuries in monasteries. Then the nuns came up with an original way to decorate the feathers for writing. They twisted thin strips of paper with gold-plated edges, thereby creating the effect of elegant precious jewelry. However, due to the fact that paper at that time was a costly material, only noble persons could be engaged in paper-twisting (namely, quilling was called in Russia). Over time, this type of needlework reached the countries of the East, which enriched it with new techniques and created the Paper Lovers Association.
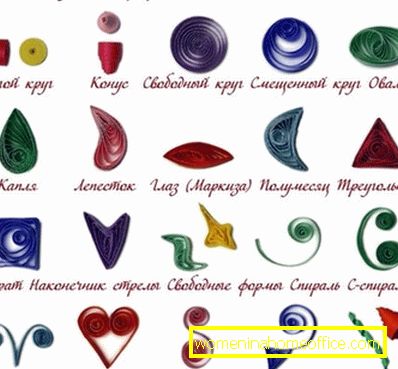


Crafts in the technique of quilling are made using elements twisted from thin paper strips, which is given a certain shape. There are several main types of twisting - making so-called rolls:
- "tight spiral" (roll up the strip, glue the end);
- "drop" (do not make a spiral spiral, squeeze one end with two fingers);
- "free spiral" (we do the same as the tight, just before gluing the roll slightly relaxed);
- “drop with a bend” (after the droplet has been formed, one corner is slightly lowered);
- "arrow" (form a free spiral, compress it with a triangle and bring together two edges);
- "semicircle" (we align one side of the free spiral);
- "eye" (compress the two ends of the free spiral);
- "diamond" (we make a relaxed spiral and compress both corners);
- "sheet" (directing the corners of the "eye" in opposite directions);
- "triangle" (the relaxed spiral is compressed into three corners);
- "moon-crescent" (stretch a relaxed spiral into a crescent shape);
- "pyramid-cone" (make a tight roll and pull out the inner edge);
- "bird's foot" (make a triangle from a relaxed roll and squeeze the two corners to the third);
- "star" (we do a clip of 5 corners on a relaxed roll).
Twisting strips of paper is not an easy task even for children. Quilling is based on a combination of such elements, allowing you to create whole pictures, as well as:
- applications;
- postcards;
- decorative elements;
- accessories;
- toys, etc.
What do you need for paper plastics?
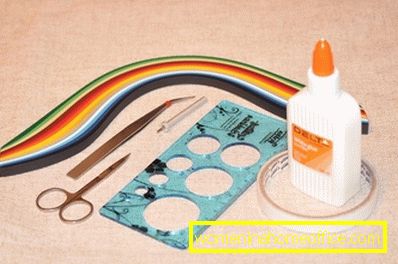
In order to make crafts aesthetic, and the process itself caused joy, you need to take care of the materials and tools. As for the first, everything is quite simple here: printer paper is cut into strips from 3 to 10 mm wide. But with the accessories things are more complicated. To spin the need:
- a special machine (you can buy it at a handicraft shop or make it yourself by pushing a thick tapestry needle with a bit off the ear into a wooden handle);
- tweezers (it is convenient for them to pull out or fill their tails);
- sharp thin scissors with straight ends;
- stationery scissors;
- tape and ruler;
- PVA glue;
- toothpicks;
- cardboard (as a basis for bulk crafts);
- stencil for blanks (panel with holes for the finished elements);
- machine for fringe (sold in specialized stores).
Flowers, made in papermaking technique
For beginners, the easiest way to disassemble the scheme with a description of quilling flowers from roses - as recommended by craftsmen.

Instruction:
- Cut a strip of paper with a length of 20 cm and a width of 10 mm.
- Insert the end of the strip in the eyelet and wind around the axis 3 times.
- Toothpick up the glue and place the paper tape at a right angle to him.
- We make one more turn with a bell to the needle and drip glue again.
- Repeating steps 3, 4, we put the entire strip. Rose is ready.
Another uncomplicated flower - cornflower.
Instruction:
- We make 6 strips of blue paper 4 mm wide and 20 cm long.

- We form arrows from them.
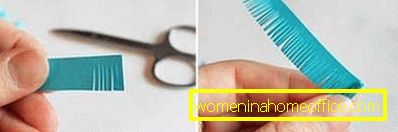
- Cut off a strip 20 cm long and 10 mm wide, make a fringe on it.
- Fold the ribbon with a fringe roll and glue all the elements. Cornflower ready.

Imagine how nice it is to get a hand-made New Year's card with a chamomile appliqué! And you can make such a bouquet in an hour.
Instruction:
- We cut 8 strips of white paper with a width of 6 mm and a length of 20 cm.
- We twist them "drop".
- Cut out a yellow paper strip with a width of 8 mm and a length of 20 cm.
- Make her a tight roll.
- Glue the elements - chamomile is ready.
Separately, it is necessary to dwell on the creation of volumetric flowers. For their foundations need a special cardboard cone.
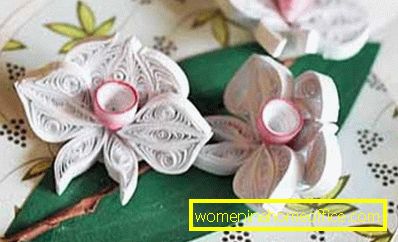

Instruction:
- Cut 14 strips 20 cm long and 5 mm wide.
- Make 1 "eye".

- Glue 2 crescents to it.

- Repeat steps 2, 3.

- We form an “eye” again, but this time we glue 2 crescents to it from above and below.
- Create 2 "waves".

- Twist the "tight spiral" and squeeze out the middle part.

- This item is tinted in a red tint (using a stamp pad or crayons).
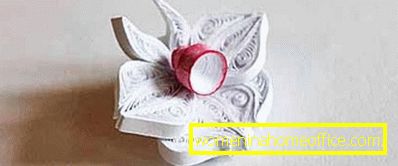
- Glue the parts on the cone-blank. The orchid is ready.
No less original and beautiful on handicrafts (especially in applications on notebooks, notebooks) looks lily. For her, too, need a cardboard base.

Instruction:
- Make 14 drops.
- On the edge of the base cone glue 8 blanks.
- The second tier sticking another 5 "drops".
- The last element is defined in the center. Water lily ready.
Pictures in the technique of quilling
Bulk pictures of paper twists - a very modern and stylish home decoration. You can create a composition of paper rolls to your taste, or you can use the master class of quilling pictures with step by step photos.
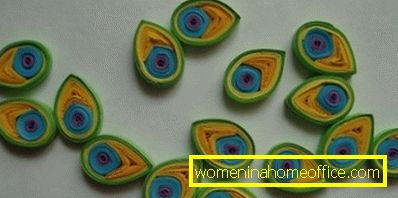
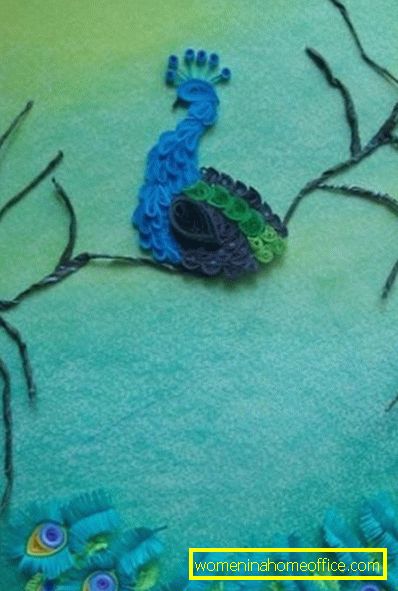
Royal Peacock
A bright bird with a luxurious tail will look great in the living room and in the hallway. Colors can be chosen to your taste. In total, it will take about 150 strips of different colors with a length of 30 cm and a width of 10 mm, as well as 100 strips with a length of 10 cm and a width of 7 mm.
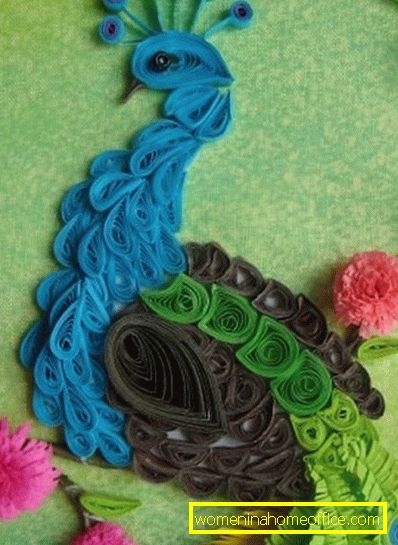
Instruction:
- Twist 20 tight rolls and as many "triangles".

- We stick together figures.

- We wind blanks with 2 strips of different colors.
- Making fringe of 20 strips.

- On the ribbon with a fringe do the fold in the middle, spread with glue.
- We attach a multi-colored blank and glue it so that the free ends of the fringe come together.
- On paper, draw a sketch of a peacock.
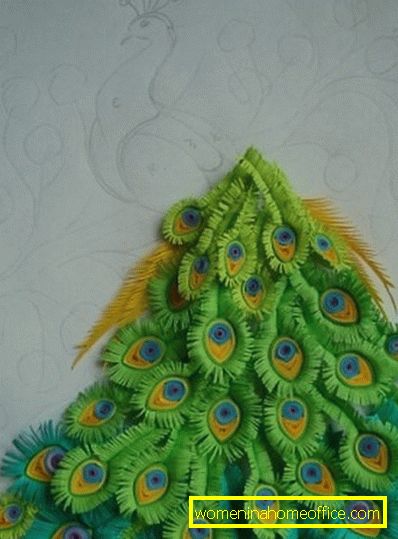
- Glue the tail.
- Making blanks, "drops".
- We spread the body of the bird, beak.
If desired, the background of the picture can be tightened with organza.
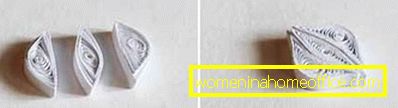
Bright butterfly in paper plastic technique
Unusual and stylish look panels of coarse fabrics with paper applications in the technique of quilling - for example, with bright butterflies.

Materials:
- beige paper sheet
- 8 pink and 8 yellow ribbons 29 cm long and 3 mm wide
- 2 crimson stripes 29x3
- glue
- toothpick
- pencil
- scissors.
Instruction:
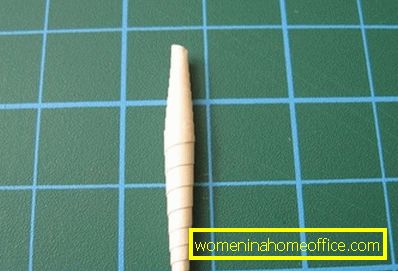
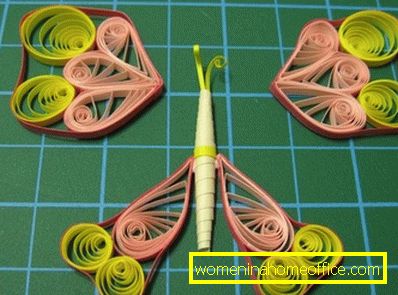
- We start with the calf. Cut out an isosceles triangle with a base of 7 cm and a side of 15 cm out of beige paper.
- Screw it from the base to the pencil.

- Toothpick distribute the glue along the edge and fix the workpiece, pull out a pencil.

- Cut out a pair of antennae from the remnants of yellow paper, curl the upper ends and fasten it on the body.
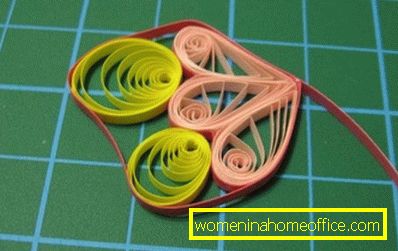
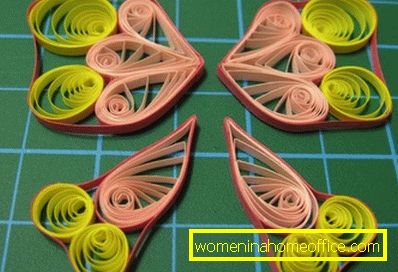
- We form 8 "drops" of pink color.

- We stick together on 3 "drops" - these are butterfly wings.
- Pasting strips of crimson color blanks wings.

- Underwings are also wrapped with a bright strip.

- We make 4 "free spirals", glue them to the main wings.

- Paste the shape of a crimson ribbon.
- On the fenders we place 2 "free spirals", also paste over.
- We collect the shape of a butterfly.
Schemes with the description of handicrafts in the technique of quilling are useful not only for beginners, but also for already experienced craftswomen who are fluent in various paper-twisting techniques. After all, on the basis of basic figures, you can create new bright, unique things, make original compositions from them and decorate the interior with them, aesthetically and unconventionally decorate gifts.