Papier-mache do-it-yourself newspaper
Paperwork in papier-mache style comes from France. The first works were presented in the 16th century. But in our country, papier-mâché became popular during the reign of Peter I. Today, many children and adults master this area of applied art. We will tell you how to make papier-mâché with your own hands.
Basics of papier-mache: improve your skills
First, let's find out why this kind of applied art is called papier-mâché. Literally translated from French, this concept refers to torn paper. Indeed, papier-mâché crafts are made of paper waste and ordinary glue.

Most often, people who master this area of applied art are interested in how to make papier-mâché from newspapers. We will talk about this a little later, but now I would like to tell you that there are three main ways of making papier-mâché:
- Newspaper or offset paper is torn into small pieces and treated with glue, creating a kind of product layers. The greater the number of layers, the stronger and more beautiful is the product.
- The second option is paper pulp. To do this, the paper is first soaked in water, and then carefully frayed using kitchen appliances. Diluting this mass with glue, we get a working flexible and elastic material.
- The third option is used very rarely, because to create a structure you need to use a thick cardboard. Most often, this method is used in industrial sectors.
Today, you can design various papier-mâché crafts with your own hands, in particular:
- caskets;
- plates;
- mugs;
- Carnival masks;
- Easter eggs;
- beads;
- earrings;
- gift boxes, etc.
Cooking high-quality paste

Before we take a step-by-step guide on how to design papier-mâché with your hands for beginners, let's find out how to make a paste. This is a mandatory part of the manufacture of crafts. This glue will be the cement that will ensure the density of the created masterpiece.
Most often, needlewomen use ordinary stationery glue diluted with filtered water in proportions of 1: 1 to lubricate paper layers. But you can make a paste and independently, controlling the desired consistency. Wheat sifted flour, food starch and water are used for this. Brew such a mixture to a thick and sticky mass.
Practical advice: we will replenish the needlewoman’s piggy bank

Depending on what kind of crafts you are modeling, depends on the duration of its manufacture. It is recommended to dry every four paper layers thoroughly. In order to make the craft strong, drying should last from 24 to 48 hours. You can make ready-made crafts at your discretion, for example, in gouache or watercolor, using decoupage technique, lace, etc.
In order for crafts made in papier-mâché to become a real work of applied art, familiarize yourself with a number of practical advice:
- If you use paper strips to simulate crafts, then you need to lay them out in a chaotic manner, constantly changing direction.
- Instead of offset paper or newspaper, you can use egg packs, cardboard waste, corrugated or toilet paper, napkins.
- All actions on the design of crafts are performed in latex gloves so that the paste will not remain on the surface of the hands.
- Before a designer's jewelry, its papier-mâché base can be sanded using emery paper.
- For giving additional bends and smoothness it is possible to use construction filling.
- If you apply paper layers on a specific blank, then its surface must first be treated with sunflower oil. So you will ensure the preservation of the shape of the product and its easy separation from the walls of the workpiece.
- If the finished crafts will be white, then you need to use clean white paper.
- Coloring crafts gives it not only originality, but also additional protection.
- If you want to protect the product made of papier-mâché from moisture, apply a clear varnish on the finished craft with the last layer.
Become a star of carnival night
Carnival is a great event! It is a pity that today many of us simply do not have time to visit such holidays. If you still had the chance to visit the carnival, then do not deny yourself the pleasure, especially since now you will learn how to make a papier-mâché mask with your own hands.
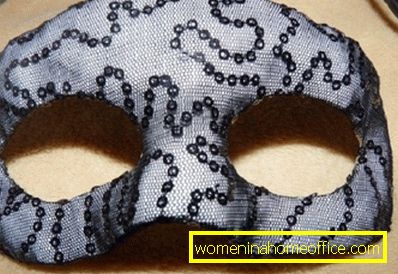
For the basis of the mask, you can use any clay or plastic form. We suggest you make a mask along the contour of your face. So you will be sure that the holes for the eyes will not be after making the product on the nose or above the eyebrow line. For decorating we will use the original lace fabric and beads. And for mounting, you can take one stick or gum.
Many needlewomen say that the flour paste made no harm to the delicate skin of the face, but on the contrary, made it softer and more elastic.
Necessary materials:
- newsprint;
- napkins;
- filtered water;
- sifted flour;
- scissors;
- fabric openwork cut;
- elastic;
- ribbons with sequins;
- office glue;
- brush.
Step-by-step description of the creative process:
- To start prepare the adhesive mixture. To do this, lay out the sifted flour in a deep bowl and add filtered water.
- Mix the paste carefully so that the mass is homogeneous.

- Next, take a newsprint and cut it into equivalent squares. The length of one side is approximately 1.5 cm.
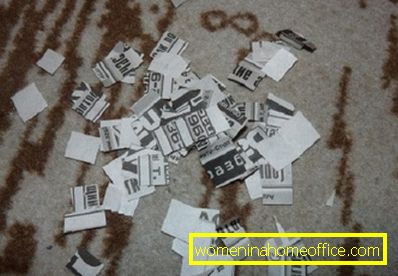
- Equivalent strips cut the napkin.

- The skin of the face thoroughly we coat with petroleum jelly.
- We wet the newspaper squares with water and apply it on the face, modeling a mask of the desired size and shape.
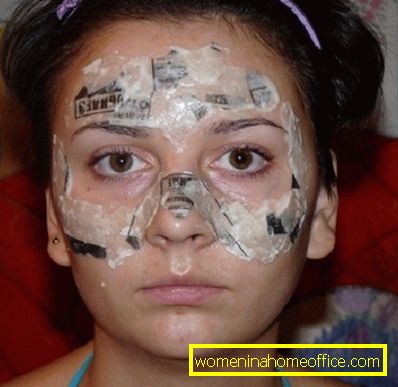
- From above the first layer is thoroughly coated with prepared paste.
- With the second layer we also lay out newspaper squares, observing the given mask shape.
- Pre-newsprint paper thoroughly moisten with paste.

- Next, lay out a layer of strips cut from the napkin, we coat it with paste.
- Then lay out the newspaper layer and again strips of napkins.
- In conclusion, we thoroughly saturate our billet with prepared paste.
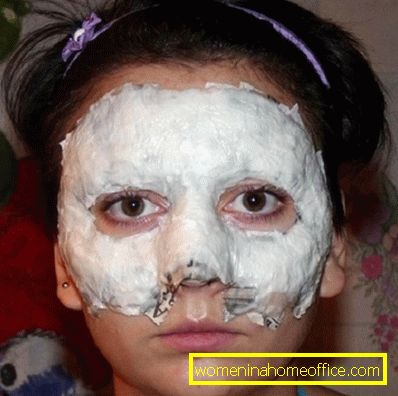
- Wait until the material hardens slightly, and dry it thoroughly with a hairdryer.
- Carefully remove the mask from the face and put it in a warm place for a day. It is best to choose a flat surface so that the mask does not bend.
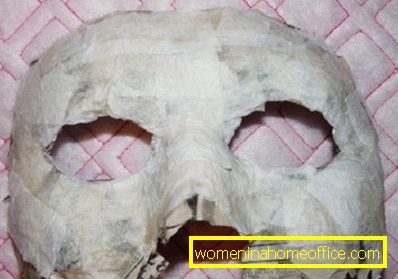
- After the mask is completely dry with scissors, carefully cut off the excess parts of the newspaper, forming a smooth edge. Do not forget about the holes for the eyes.
- Now we take the prepared openwork fabric for decoration.

- We wrap the fabric around the mask and carefully fix the inner edges of the craft using glue.

- After the glue dries, cut out the holes for the eyes and fix the free edge of the openwork fabric with glue.
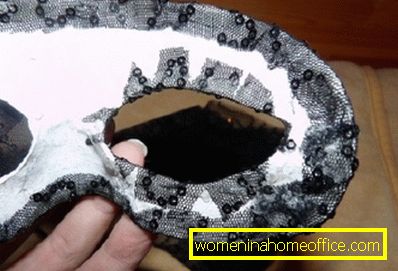
- Carefully make holes on the edges of the mask and pass through the gum.
Step-by-step description of the creative process:
- To begin, prepare the necessary source material.

- Cut the newsprint into approximately the same size.
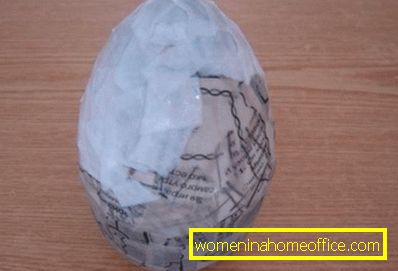
- We lay out the newspaper in a bowl with water and slightly soak it.

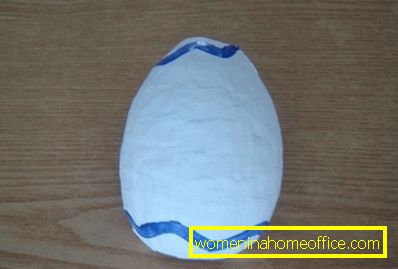
- Apply to the workpiece wet newsprint in one layer without the use of adhesive mixture.

- Next, stir the adhesive mixture, diluting 1 part of glue with two parts of filtered water.
- Each next layer of newsprint paper is richly coated with the prepared adhesive mixture.
- There should be 7-8 paper layers in total.

- Leave the egg to dry for 24-36 hours.
- Then we cover the paper with white gouache paint and wait until it is completely dry.
- Carefully cut the dried form with a knife and remove the base.

- Using high fixation glue, glue the egg along the cut line.
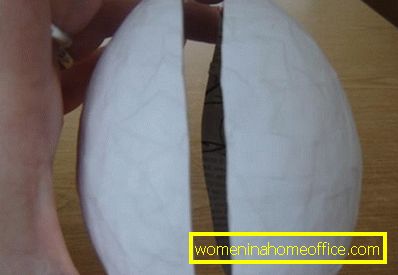
- Paint the egg at your discretion with watercolor or gouache paints.
As you can see, everything is very simple. You can make any souvenir in the style of papier-mâché and present it to your loved one. Successes in all undertakings!