Paper swan do it yourself
If you like to make figures with your own hands, make a swan. Paper swan will be not only a decoration for your home, but also an excellent gift. Making a swan out of paper with your own hands is not difficult, but long enough and painstakingly, since the bird is made from a variety of modules.
The technology of the modules was invented by the Chinese, who first began to perform three-dimensional figures. Figures of the modules are made up of identical triangular elements. Each module is made up of sheets of paper, which are then interconnected by inserting the module into each other.

How to fold a triangular paper module?
To make a paper swan, you need a lot of different-colored modules. The paper for the modules must be taken of high quality and sufficiently dense.
The modules are made up of colored paper rectangles. The aspect ratio of the rectangle is 1: 1.5. The necessary rectangles are obtained if you divide an A4 sheet into 4 equal parts.

Put the rectangle face down. Bend it in half.

Extend the rectangle - it will help to outline the middle line.

Bend the edges of the rectangle to the middle.

Turn the workpiece over.

Bend the corners. Leave a gap between the folded corner and the upper triangle.

Lift the edges of the corners up.

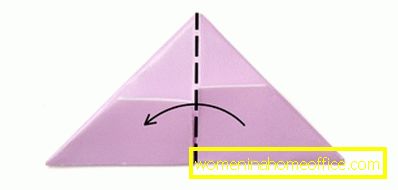
Fold the resulting billet in a triangle.

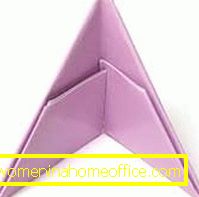
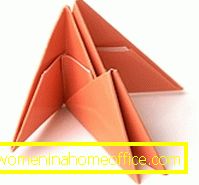
The resulting module should have 2 pockets and 2 corners.

Paper swan: how to connect modules with each other?
To create a swan with your own hands, you will need a lot of color modules, which then will need to be inserted into each other.
Number of color modules:
- Red - 1 pc.
- Pink - 136 pcs.
- Orange - 90 pcs.
- Yellow - 60 pcs.
- Green - 78 pcs.
- Blue - 39 pcs.
- Blue - 36 pcs.
- Violet - 19 pcs.
If you decide to make a snow-white swan out of paper with your own hands, take 1 red module and 458 white modules.
Take the 3 modules pink. Insert the corners of the two modules into the pockets of the third module.

Take 2 more pink modules and insert them in the same way as the previous two. So make a ring. The ring should consist of 2 rows: the inner row - the modules stand on the short side, and the outer row - the modules stand on the long side.


Each row should consist of 30 modules. Carefully assemble the ring along the chain. The last module to close the ends of the circle.


Using 30 modules of orange color, make the third row. Modules must be worn staggered.


In the same way make 4 and 5 rows. These rows should also consist of 30 orange modules. Grasp the edges of the resulting figure with your fingers and turn the ring inside out. You should have a pointed shape that looks like a stadium.


Continue to insert the modules by completing the 6 row of the figures from the yellow modules. You need to put the modules on top of the blank. The location of the modules should be exactly the same as in the previous rows.


From the 7th row begins the formation of the wings of a swan from paper with his own hands. Decide where the bird's head will be located. Choose a pair of corners - this will be the place of attachment of the neck. To the left and to the right of this pair of modules, make one row of 12 yellow modules. Thus, the seventh row is 24 modules.


Keep making wings. Each next row is reduced by 1 module. Eighth row - 22 green modules. Ninth row - 20 green modules. The tenth row - 18 modules green. Eleventh row - 16 blue modules. The twelfth row - 14 modules of blue color. Thirteenth row - 12 blue modules. Fourteenth row - 10 blue modules. Fifteenth row - 8 blue modules. The sixteenth row - 6 purple modules. The seventeenth row - 4 purple modules. The eighteenth row - 2 modules of violet color. You made wings. Give the wings of a swan a convex shape and slightly bend the upper modules of the wings.


It is time for a swan tail to do with paper. For the tail is enough 5 rows. Each row is reduced by 1 module. For the swan tail, you will need 12 green and 3 blue modules.


To make a swan neck, insert the 2 corners of one module into the two pockets of the other. Attach 7 purple modules to the red module. Give your neck a bend.


The beauty of origami is that you do not need anything but paper and patience. No need to glue, cut and sew. The swan of the modules will not disintegrate anyway, because the friction force reliably holds the modules together.
A source: masteru.org.ua
Paper swan do-it-yourself is hard work that requires hard work and some skills. Do not expect that you will be able to make a swan out of paper the first time. Practice your origami skills and you will succeed.