Paper angels with their own hands
Paper is a material available in our time from which you can make almost anything, the main thing is to show desire and imagination. If you have a fantasy, you can make absolutely incredible and fabulous works of art out of paper, surprising friends and relatives with your skill.
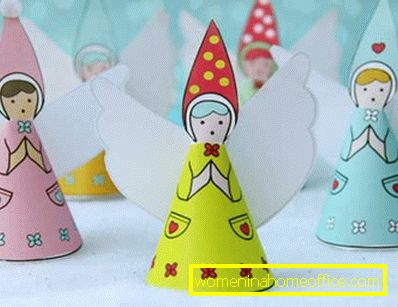
Sometimes ideas of fakes arise in the head independently, and sometimes it is necessary to draw inspiration from pictures or stories. You can, for example, make paper angels that will decorate your home and protect it from harm.
Angelochkov their paper with their own hands can make almost any child and adult, showing desire.
How to make an angel out of paper with your own hands?
You will need:
- A4 plain paper
- Sharp-pointed scissors
- Compass
- Simple pencil - for templates
In addition to paper, you can take cardboard, drawing paper or ordinary disposable plates. Such figures turn out stronger and durable. By the way, the angel does not have to be voluminous. If you draw well, you can simply draw a beautiful angel on paper, cut it out and put it on the table as an ornament.
Instruction:
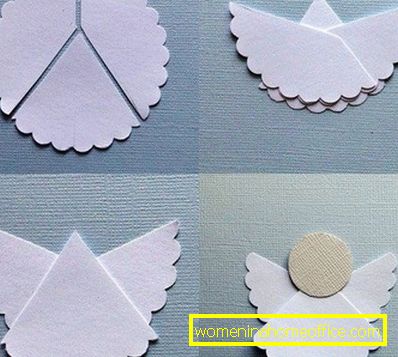
- Draw the inner circle with an arbitrary radius - it will be the head of the angel.
- Draw another circle with a radius of 3 times more than the previous circle - it will be the wings and torso of the angel. Here is your template by which you can make any angel.
- Draw a vertical line that should be in the middle of the inner circle (head). Only the line should not reach the end of the circle. You also need to draw two short horizontal lines. These lines should be equal to the radius of the small circle.
- Cut both circles and cut them into three drawn lines, leaving a small portion of the circumference of the small circle uncut (this is necessary for the angel's neck).
- Bend the wings and insert the cuts into each other, aligning the points "a" with "a", "b" with "b".
- Angel is ready! If necessary, it can be painted in colors and decorated with tinsel or beads.
- To give angels additional volume, you can use the pencil to curl the edges of the clothes and wings with the angels.
Paper angels do it yourself in Kusudama style
If you like origami, you can try to make a cute angel out of paper with your own hands in the style of kusudama. Kusudama is one of origami varieties, the predecessor of modular origami. In the style of kusudami, the angel is also assembled from modules, but the elements are glued together with glue and sewn together with threads.
The style of Kusudama is intended for advanced paper “creators” and not for beginners. To make one module kusudama, you need a square sheet of white paper.

Module kusudama for angel paper with their own hands
- Bend and unbend a square sheet of paper, tracing diagonal lines.
- Bend and unbend the sheet, outlining the center horizontal and vertical lines. Turn the sheet.
- Fold the sheet at the same time along the marked lines. The result is a double square.
- Position the leaflet down and fold the edges to the middle of the square in front and behind. If you did everything correctly, you will have four "pockets".
- Open and flatten one of the pockets.
- Scroll through the left side of the prepared form to the right.
- Do the same “procedure” with the remaining three “pockets”.
- Lay out the sheet on the side where there are no "pockets". Fold the edges to the middle of the shape.
- Fold the corner.
- Scroll through the workpiece, repeating three times the previous 2 points.
- Deploy the workpiece completely.
- Click on the center of the sheet with the intended folds. It should become concave.
- Proceed to the complete collection of modules. Starting at the top corner, take the paper and bend it along the lines.
- Get the folds around the corner of the square back. Folds should "meet in the back."
- You should have the so-called petal, which must be bent to the middle along the outlined folds.
- Bend the corner inside.
- Scroll through the right side of the shape to the left. Repeat the process of turning with all the petals.
- Bend the corner of the petal again.
- Repeat three times the previous operations.
- As you can see, it is better not to meddle with newcomers.
- Having built the Kusudama module, we proceed to making the angel itself out of paper with our own hands.
You will need:
- White paper for wings and angel dress
- Silver or gold cardboard (white cardboard and foil) for angel halo
- Polyfoam for the face angel
- Spray paint in gold or silver color for wings. It is necessary for the halo
- PVA glue
- Scissors
- Needles
- Durable and transparent thread
- Toothpick
- Compass
Instruction:
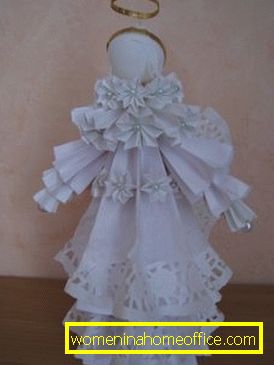
- Angel body:
- For a dress: white paper with a size of 20x20 cm. For sleeves: two squares with a size of 12x12 cm. For a collar: ten squares with a size of 6x6 cm. Make of them modules.
- Assemble the collar. To do this, string on a needle with a thread all 10 squares of the collar.
- Pull and tie the ends of the thread. It should make a ring. Thread one sleeve, then the dress, then the second sleeve. Tie the ends of the thread. Cut off the extra tips.
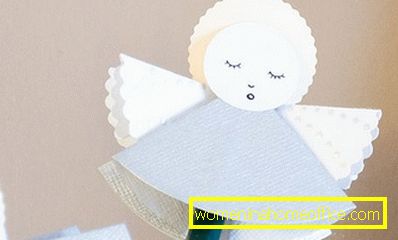
- Angel Head:
- Make a halo. Cut two circles out of cardboard (silver or gold). The diameter of the circle is 6 cm. Glue a toothpick between the circles and glue the circles together.
- Cut out the head of the angel from the foam. Cut a small triangle in the blank. The face is glued to the finished halo with a triangular groove to the toothpick.
- Making curls. Cut strips of white paper (length - 12-15 cm). Glue the strips in the middle between them in the center. Using scissors, curl each of the strips.
- To make a bang, use 3-4 narrow strips (length 3 cm). Curl the "bang" to the hair below.
- Glue the hair to the head. Apply glue to the bottom layer of hair and stick curls tightly to the halo.
- Angel Wings:
- Cut a circle out of white paper (diameter 15 cm). Fold the circle in half. Unroll it and put an edge up. Pinch along the fold.
- Make a fold 0.3-0.4 cm wide. Turn the workpiece over and make the same fold. Alternating the folds, do so with the top of the circle.
- Corrugate the lower part of the circle in exactly the same way.
- On both sides, paint the wing blank with spray paint.
- Squeeze the folds of the workpiece and bend it in half.
- Build angel:
- Put the collar on the torso. At the same time try to combine the hole with the top of the dress angel.
- Make a small hole with a needle in the top of the dress. Insert the head there, after putting glue on a toothpick.
- Apply glue to the place where the wings are folded and glue them to the collar.
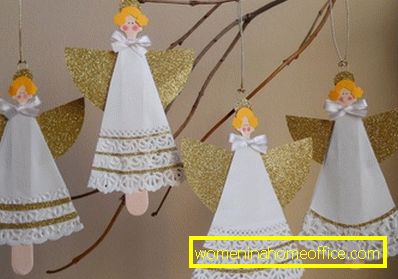
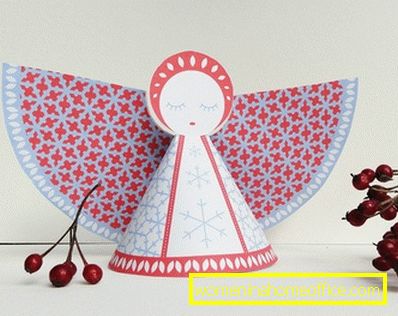
Paper Angels: Ideas


Read also:
- What is shuriken?
- How to make a paper pyramid?
Angel is ready! For step-by-step technology with images, see Olga Kiryanova’s master class on learnlye-ruchki.ucoz.ru.
Paper angels with their own hands to make easy! Good luck!