Keyframe decoupage
If in a big apartment the keys to the garage, car, mailbox and summer house are always lost, and the most important thing is trying to disappear somewhere else - a bunch of house keys, you definitely need a housekeeper. Here are just options presented in stores, often look the same. It is much better to independently build a housekeeper and arrange it with the help of decoupage.
Decoupage housekeeper with their own hands: the preparation of the frame

Almost all wooden products are decoupage after they are parsed, so with such a small thing as a housekeeper, it is recommended to start working with its creation, and not to buy a ready-made version in the store and try to decorate it. Moreover, to make the frame is not difficult: in addition to several hooks, the number of which depends on the number of keychains, you will need chipboard cuts, thin boards, small short studs, a hammer. And for the decoration itself, acrylic lacquer, a sponge, a map represented by a special paper with a selected pattern, glue (it is better to take PVA as the most convenient to use), acrylic paint and lacquer to create a craquelure - cracked coating effect will be used.
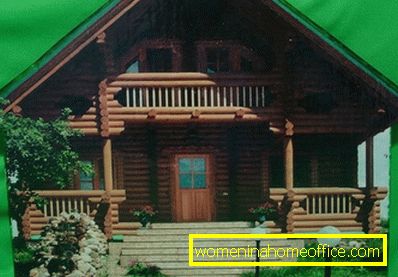
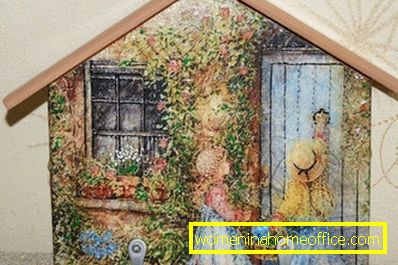
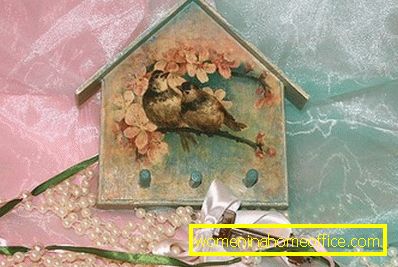
The size and shape of the housekeeper depends only on how you want to see it: will it be a simple wooden rectangle enclosed in a frame, the only highlight of which will be a certain pattern, or the panel for storing keys will appear in the form of a small house, a big heart or a lush flower , on each petal of which is a hook. Since it was decided to decorate the housekeeper using the decoupage technique, it was recommended to choose a comfortable and homely style: a traditional house with a chimney on the roof would fit perfectly.
A pentagon is cut from a chipboard, which can be marked with a pencil, like a rectangle stretched upwards and a triangle on top of it. It is desirable to make the top with an angle of 90 degrees, and not sharpen to smaller values. Then 2 boards are carefully sanded, from the 1st end each of them needs to be cut off part diagonally, so that when connected by these sides they can form a right angle. These boards will be the "roof" of the house-housekeeper. Go down, beyond the "walls", their edges should not be more than 1-2 cm - depending on the size of the house. After that, the chipboard and the boards are connected with short small carnations, driven in from the wrong side of the product: the one that comes into contact with the wall of the apartment. At the final stage, the workpiece is degreased with any product containing alcohol and dried.
Separately, you need to prepare a zone where the hooks will be located. It will not take much time - an arbitrary shape is cut from a free board or slats, the dimensions of which are smaller than the size of a key holder. It is also sanded and fixed on the front side of the "house" on the reverse side with the help of small carnations. There is no sense in fixing hooks on it now: in the process of decoupage, they will inevitably be painted over, which will require extra steps to clean them. The main thing is to make sure that later they will easily connect to the frame - you can immediately mark the holes for inserting the screws (most of the hooks sit on them and not on the nails) or even cut them with a drill.
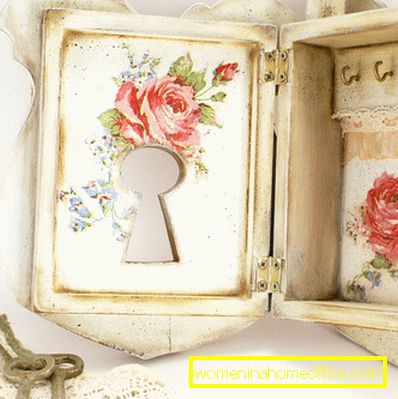
Master class on the design of the key keeper
Whatever design for the housekeeper you choose, the preparation of the wooden "canvas" is done in the same way: initially you need to tint the surface with white acrylic paint. It is applied and distributed with a porous sponge, stamping movements, without stretching the tool. Pre-paint, it is desirable to distribute a thin layer on any metal surface that will play the role of the palette. If you immediately put the paint on the sponge, it will also transfer to the surface tightly and it will be very difficult for you to stretch along the wood that is easily absorbed by the liquid.
Despite the fact that the layer is needed thin, the gaps can not be left, so watch the uniformity of staining. After the 1st layer, the product is laid aside for 4-5 hours, during which the paint should completely grab and not leave marks on the fingers when touched. Then you will need to apply another 1 layer, which finally smoothes out possible surface irregularities, allowing the next color layers to lie brighter and richer.
The next stage is more creative: it works with a decoupage card. It is a rather thin, but not fragile paper, which, with good quality, does not change its appearance even after 5-10 years, and is not amenable to external factors of influence - moisture, sunlight, etc. The method of use for dekupuzhnyh cards of different types is not the same: very dense need preliminary long soaking, thin do not give bubbles, so they can be superimposed on the product in a dry form. Nevertheless, professionals recommend any decoupage card before working with it to place in warm water for at least 2-3 minutes (for dense options - 10 min), and only then transfer it to the surface subjected to decoupage. If the size of the card exceeds the size of the product you need, first attach it in a dry form, mark the contours with a pencil and remove the excess with a knife. When trying to fix a pattern with a larger area, deformations may appear, spoiling the whole look.
The glue is applied to the wet decoupage card on the wrong side so that it does not reach the edges by 1-2 cm. Then the card is located as exactly as possible on the surface, and it is smoothed through the file or paper attached from above. It is recommended to do this either with a dry soft cloth, so as not to disturb the drawing, or with a rubber spatula: neither metal nor plastic can be used. With a slight pressure on the surface, the map is smoothed from the center towards the periphery, as a result of which all air bubbles trapped under it should be eliminated. After this procedure, the edges are glued, and the image is given a time - 1-2 hours - for drying.
After the specified time, you can proceed to the next stage: painting the free parts of the key keeper. In this case, this is the "roof" of the house and the part to which the hooks will be attached. Acrylic paint of the chosen shade is also applied with a thin layer, but already with a brush, filling each groove in the wood. After 2-3 hours, a varnish that creates the craquelure effect is placed on top, and it waits again for 1-2 hours before a darker paint is applied to it. After that, the entire housekeeper is twice processed with a transparent acrylic varnish, which will perform a protective function. It takes 30-60 minutes between layers for the lacquer to grasp.
Tips and craftsmen variety of options


The main point in the decoupage is to work with a special card: if you correctly implement the technology of its shrinkage on the product, we can assume that the decoration of the object has already succeeded. But sometimes it seems to the masters that something is missing: the raisin, in the resulting work, some accent that will attract attention. Such a small, but important from the point of view of aesthetics, a nuance can be the application of 3D varnish on a decoupage map. This tool allows you to select certain points in the figure, which gives it depth. After you close the product with a simple acrylic lacquer and give it time to dry, apply a special 3D lacquer on selected areas with a thin brush, trying to make the layer dense, but not thick. Fix it with ordinary varnish is not required.
You can also emphasize the areas of the pattern that you like with acrylic paints: they are applied under the acrylic varnish, preferably between the 1st and 2nd layer, so as not to make the final coating too thick. What area to paint and how many colors to use is up to you. The main thing, do not forget, after each action, to give a means to grasp and harden, so as not to spoil the whole picture with a new layer.
In addition to the planar additions, the key-house decorated using the decoupage technology can also be decorated with a three-dimensional design, if it fits into the idea. For example, if there are flowers in the image, you can duplicate them with the same ones made of thin polymer clay, fabric, threads, beads, and other materials, sat down with PVA glue or with a glue gun. The same applies to other small parts. In addition, the volume can be internal, when the frame for the key house initially has an attractive relief: carved curls, the texture of the bark of the tree, etc.
Even those who have not tried to create using this technology will be able to carry out the decoupage of the housekeeper with their own hands. It is only important not to lose the memory of working with decoupage cards from memory and be sure to record the result with varnish so that the product does not lose its attractiveness after the time has elapsed.