How to cross stitch beginners
Embroidery is traditionally considered the most popular type of needlework. Many modern women are passionate about this ancient hobby, with pleasure mastering various techniques. For example, knowing how to properly cross-stitch, you can create stunning patterns and even decorate clothes.
Embroidery in the technique of a cross has long been considered a necessary skill for every girl. Over time, the requirements have changed, and now it is not often possible to meet needlewomen who spend time behind the hoops and intricate patterns. And yet the last time in the fashion again returned products decorated with embroidery. Especially popular are paintings with a pattern of threads. For such works, the technique of embroidery is most often chosen by a cross, since this is the easiest type of embroidery, requiring only suitable tools, accuracy and concentration.
Embroidery tools
In order for any work to take place, it is necessary, as is known, to use the right tools. And embroidery in this case is no exception. With the necessary adaptations, handicrafts will give you pleasure not only by an excellent result, but also by an interesting process of creativity. So, for cross stitching you need to take:

- embroidery threads - floss or iris;
- a blunt end needle to avoid puncturing the warp threads;
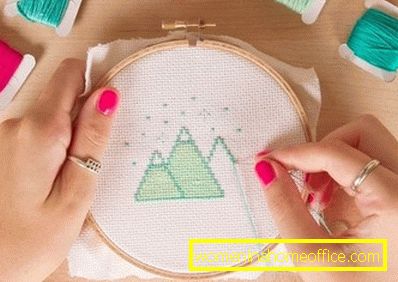
- hoops - 2 special circles, fabric with a pattern is inserted between them;
- canvas (cotton base with small squares, which are convenient for creating cross stitches);
- scissors;
- the scheme of the embroidered pattern.
Technique of traditional cross-stitch
To figure out how to properly embroider a cross, for beginners it is important to understand the principle of creating these same crosses. After all, the wrong side of the picture should look no worse than the face — this is what determines the skill level of the needlewoman. Therefore, all stitches need to be done in the same direction with the same thread tension. The most convenient is the Danish cross-stitch.
Instruction:
- First of all, we divide 1 thread of floss into 2 equal parts, that is, three threads each. If you work as an iris, the string is taken 1.
- We thread the needle, no need to make a bundle.
- To fix the thread on the canvas, on the side of the picture we fold the thread in the form of a loop.
- Now we draw the needle in the lower left corner of the square of the canvas, leaving a loop.
- We withdraw the needle to the same hole so that it passes through the loop left on the front side.
- Inject the needle into this corner again and draw it through the purl loop.
- Now we make stitches from the front side to the back from the upper left corner to the lower right.
- After the end of the embroidery row, we make stitches towards each other, that is, from the top right to the bottom left corner. From the side of the figure, even identical crosses are obtained. From the seamy side we get straight parallel stitches. This means that the work is going right.
How to embroider according to the scheme?
Half the success of embroidery depends on a properly processed pattern. There are 2 options for transferring the pattern to the fabric. If the picture is embossed on the canvas, then the craftswoman is required only to pick up the threads and, after pulling the canvas on the hoop (or without them), start work. If the picture is depicted on paper, then you need to do some calculations.
Instruction:
- We take drawing on paper. It should be a piece of a cell, each cell is a cross. On the diagram we draw horizontal and vertical lines defining the center of the picture.
- In order for the canvas not to complicate the process of embroidery, we process its edges with scotch tape or flizelin, paring it with an iron around the fabric perimeter.
- Now mark the middle of the canvas. Fold the fabric horizontally and vertically, mark the center.
- The next step is to calculate the length and width of the picture. Measure out on the scheme the longest and widest part of the picture.
- The resulting rectangle is divided into squares (10x10 cross-cells are more convenient).
- We direct each square with a pencil.
- On the canvas we also draw squares according to the number of squares of the circuit.
- We stretch the canvas with the base on the hoop so that the centers of the circle and fabric coincide.
- We begin work with a square in which the center falls.
By the way, experienced needlewomen recommend making copies from working drawings. After all, the scheme may be lost or come into disrepair. In addition, on the copies, you can make notes, deleting the passed rows.
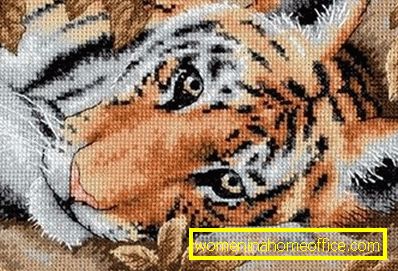
We embroider exquisite paintings: process details

The main question of embroidery of paintings is how many threads to take for work. There is an important rule: you need to take so many threads so that in the finished work you can see the pieces of the base fabric. That is, it can be 3 or 2 floss threads. It is easy to determine the length in the old way: from the elbow to the hand - so it will not grind into the eye of the needle and will not get confused. By the way, in order for embroidery to look neat, the threads of the floss should not be twisted.
For some of the paintings, the English version of embroidery is convenient: each cross is embroidered as a whole, and not according to elements, as in the Danish version. But it is, rather, more dependent on the skills of the embroiderer. And it is important to work consistently element by element. In this case, the embroidery will be beautiful, without buckles and miscalculations.
What you need to know about cross stitching large paintings?
When you start to cross-stitch, it is better not to take a big picture: the size will come with experience. But if you do decide, then consider some of the technical nuances:
- Be sure to pick up all the necessary shades of thread;
- fingers are better to take a rectangular shape (80x40 cm), since the round ones will be inconvenient due to the diameter;
- care should be taken to search for a machine for fastening fingers with a holder for drawing patterns and a special stand for scissors;
- the working tool is installed in the lit place;
- 10x10 cm squares are laid out on the canvas, and the work goes on with each square separately, sequentially from one to another.
- inside the square work is done by color.
As you can see, the answer to the question of how to cross-stitch correctly is not so complicated. To master the technique, you do not need much effort. It is necessary to devote enough time to this and to carry out each element of the pattern carefully and carefully. Then you can easily cross-stitch even large paintings.