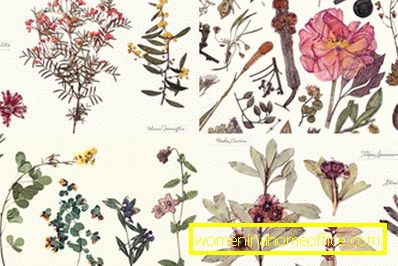
Herbarium of leaves
Very often, children from walking bring various little things that seemed interesting to them. In the warm season it is a variety of leaves, grass, flowers, etc. Sometimes parents themselves offer their children to collect green "bouquet". This can be not only interesting, but also useful - the baby will get acquainted with nature, broaden their horizons. And in order not to forget the information received, you can make a herbarium of leaves.
How to make a herbarium of leaves with your own hands?

Herbariums of scientific value, in most cases, are cataloged, where each page contains a dried plant specimen and a card with its identifying characteristics: Latin name, place of collection, etc. For large species, only a part of them is mounted on paper (for example, this is done with tree species). At the same time, the technique of herbarization is complied with, which provides the most reliable view of the mounted instance and its best preservation.
Of course, such a way to design a herbarium is more suitable for schoolchildren than for kids, because it looks not as interesting as, for example, prints on clay, which can later be used to play or decorate a room.
It is better for young children to offer a herbarium using ink paper: both the process and the result look much more exciting and allow the baby to take part in it, having plunged into the business with the head. With leaves, this technique is not so spectacular, so it is recommended to collect some herbs with fine details: for example, yarrow, cinquefoil, etc. In addition, a special coloring paper is purchased, which can be bought in a shop for creativity: the most famous brand today is Sunprint. You need to work in a room protected from direct sunlight: the duration of their contact with a sheet of coloring paper is minimized.
Since the basis for the future herbarium is thin, thick cardboard is placed under it, preventing its deformation. On the front side of the paper (it has a blue color) is a copy, which will be included in the botanical collection, then it is pressed down with a sheet of plastic or glass. The material is chosen to be transparent so that the necessary reaction takes place in the next step. That is, when the structure will be brought out in the sun (under direct rays), in 2-3 minutes. on paper will show the desired imprint of the plant. If you need to speed up the process, you can sprinkle the sheets with water.
After the time, which is set depending on the strength of the sun's rays (for winter - 5 minutes, for summer - 1 minute), the coloring paper is placed in a bowl with cool water, where there is 45-60 seconds. Then it must be removed and carefully laid out on a towel spread. The next 6-8 hours will go to complete sheet drying, where the image of the imprinted plant will gradually appear. For a small child, the process will seem like a real magic, and then you can try to guess the plants by their silhouettes.
Herbarization Rules


And yet, the majority of herbaria are created using a single technology, although it has several design options. Therefore, even elementary school students need to understand the algorithm for the collection and herbarization of leaves in order to benefit from this collection. All the points discussed below were set back in the 18th century by Carl Linnaeus, and still remain relevant. And their simplicity allows you to remember all the rules, even for children.
So, the collection of leaves and herbs for herbarium is carried out in dry weather: they are wet with unfit for further work and require additional actions for their processing. After collecting each detail of the herbarium element is straightened, creases and defects are eliminated, if necessary, they are gently ironed with a cold iron (this is especially true for the leaves).
If it turned out that the plants were collected wet, they should be allowed to dry on their own, after which they are passed on with a warm (not hot!) Iron, having previously covered them with paper sheets above and below. You should not press too much with an iron: just barely press it to remove excess volume, but not flatten it out.
The prepared herbarium element is located on the sheet, which will be the background and the frame at the same time, fixed with glue or thread (the latter is preferable), and its genus is signed above.
General description is made on the reverse side. In this case, according to the rules of botany, the herbarium is never made up in an already stitched notebook: each copy deserves a separate sheet, inserted into a folder or rolled up under glass. However, if you make a herbarium with a baby, you can use a large album for drawing. But it is better to still act "according to science."
Autumn composition under glass and in a folder

It is easiest to collect herbarium from leaves, at least because of the convenience of working with them. They almost do not contain small and thin parts that can come off at the time of cleaning and smoothing, as well as they are quite easy to fix on the surface. The paper is selected in the standard size - 45 to 30 cm, the density is average: very thin can be deformed at the time of applying the adhesive, or it will be torn off by the thread that holds the herbarium elements.
If you want to collect the herbarium in a folder, that is, to put several sheets on top of one another, it is important to protect the dried elements from damage. Therefore, a sheet of tracing paper or simply very thin paper is prepared for each of them, which will be equal in height to the height of the cardboard and will be 1-1.5 cm wide in width. This difference is necessary to bend the paper to its size and glue it on the back. "tablet" for the herbarium element. Tracing paper will cover the plant from the top, like a book cover, but if necessary, it will be easy to bend aside.
It is possible to protect the herbarium with glass: this method is chosen when several different specimens are laid out on the surface, combined on an arbitrary point. For example, you want to show the leaves of all the trees growing in your area, or simply to keep those that were collected exactly today. In some cases, particularly fragile leaves are arranged on cotton wool, which acts as an interlayer between ordinary herbarium paper and protective glass. Collected leaves located in the windows of cardboard placed between paper and glass look more systematized.
Unusual herbarium: photos and recommendations

If you are engaged in making herbarium with children, you can try non-standard ways to create it. For example, prints on salt dough or clay: such crafts later suitable even for jewelry and games. To bring the idea to life, clay is purchased, or salted dough is mixed. In its basic recipe for 2 tbsp. l flour and vegetable oil, 100 g of salt, 250-300 ml of boiling water. The resulting mass is cooled and only after that is used for modeling. If it doesn’t lag behind when kneading, you can add some more flour.
In the case of the herbarium, you will additionally need a rolling pin, a knife, colored pencils and, of course, the leaves themselves, collected on the street. They, as in the classical herbarization, are deprived of excess moisture, but do not need to be dried with an iron - otherwise there is a risk of damage during further actions. Instead, the cold dough is rolled into a layer, 0.5-0.7 cm high. You can do this a little differently by breaking the total ball into several balls, which are also crushed with a rolling pin into cakes: you end up with small medallions, each of which 1 leaf.
The herbarium element is placed in the center of the cake, lightly pressed with a rolling pin, and then you can either remove the dough in the oven with the sheet, but the latter will need to be smeared with egg yolk, or you can remove the sheet before you bake the "medallion". Then after 150-180 minutes (for a temperature of 120 degrees) on the cooled dough, the shape of the sheet is colored with colored pencils. To all the streaks imprinted as deeply as possible, the sheet on the dough is lowered backwards. Such a herbarium is not only the memory of the once collected leaves and their recognition, but also the development of fine motor skills of the child. And in the case of pencil drawing - the emergence of knowledge about color.
It is absolutely not difficult to make an herbarium with your own hands. For children, this is an exciting game, during which they get to know the world, and learning as if by chance is always more interesting and easier. For schoolchildren, a self-assembled herbarium is an additional plus in the collection of general knowledge and help in further studying botany.