How to make a tattoo at home with a needle
The owners of the first drawings on the body were the ancient Egyptians. But officially the term "tattoo" appeared in our everyday life in 1773 and its forefather is considered the navigator James Cook. To date, wearable images have become very popular, and some even learn how to make a tattoo at home.
Emphasize your individuality
Many young people tend to get an original and unique tattoo. Unfortunately, not everyone understands that a tattoo is not a temporary pattern, but the coloring matter goes deep into the skin. Therefore, such a graphic image will accompany you all your life. But if you still want to express your individuality and uniqueness, you can do a temporary tattoo.

Of course, that the application of long-term tattoos is better to trust proven experienced and qualified craftsmen. But a temporary decoration is easy to do on your own. As you already understood, today we will talk about how you can get a tattoo at home.
Before we consider the instructions for applying images to the skin, let's find out what types of temporary tattoos exist in nature. These include:
- mehendi - henna images;
- aerographic drawings;
- biota;
- translations;
- flickering patterns;
- crystal images.
If you have always dreamed of becoming the owner of a subtle and symbolic tattoo, but are not yet ready to put such a stigma on your body for the rest of your life, try applying a temporary pattern. As practice shows, this kind of tattoo is washed off after 10-14 days.
The answer to the question of how to make a temporary tattoo at home is covered directly in the selected form of the image applied to the skin. The easiest way is to work independently with translated material, rhinestones, pens, pencils, permanent markers. If you have even the slightest drawing skills, then you will master the airbrush drawings. Otherwise, entrust this business to a professional.
Before we study the basic methods of applying temporary tattoos, let's make a set of rules:
- Be sure to disinfect the skin and hands, especially if you work with a needle;
- first apply the contour of the pattern to the skin, and then just start working with the coloring matter;
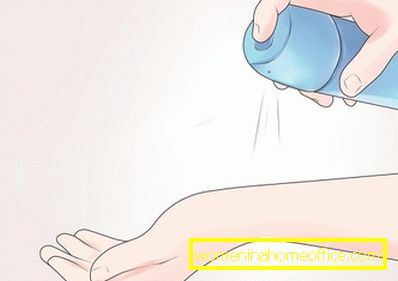
- for the tattoo to last longer, you need to sprinkle it with talcum powder on top;
- observe all precautions when working with a homemade tattoo machine;
- if you want to see the tattoo for more than two weeks, then in the first two days do not treat its surface with soap or other detergents and washcloth.
We will arrange a tattoo salon at home
Often in various forums, and in the philistine conversations you can hear that people are interested in how to make a tattoo machine at home. Basically it is of interest to representatives of a strong half of humanity. Of course, it is possible to build such a device out of scrap materials, however, please note that other people do not need to use it for tattooing. If you decide to work with such a tool, only endanger yourself. Still, permanent images on the skin should be applied in specialized salons.
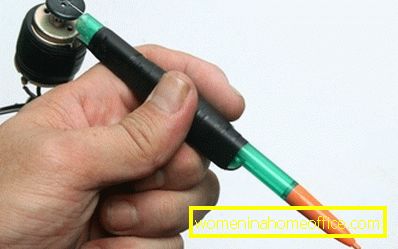
Before you learn how to make a tattoo machine at home, I would like to draw attention to the necessary supplies. First you need a motor. The basis of the machine will perform an ordinary pen, and the guitar string will be the piston for the supply of the coloring matter. The needle must be connected to the string and rotate. It is necessary for the introduction of the coloring matter in the thickness of the skin. Self-made tattoo machine looks like this.
Make a tattoo in the style of Stick 'n' pokes
If you decide to apply a tattoo with a needle yourself, then it is not necessary to use a special device. You just need to arm yourself with a thread, needle, dye and patience. Now you will learn how to make a tattoo at home with a needle. Just be sure to follow all rules of disinfection.
Necessary materials:
- razor;
- disinfectant;
- pencil or permanent marker;
- cotton pads;
- coloring matter;
- needle;
- saucer;
- cotton thread;
- candle;
- lighter.
Step-by-step process description:
- We start with the preparation of the skin. Be sure to remove hairs with a razor.

- We treat the skin surface with a disinfectant.
- Next, apply the picture using a permanent marker or pencil. Be sure to clearly draw contour lines.

- Next, carefully sterilize the needle tip. To do this, bring it up to the flame of a candle and keep it up to the maximum glow.

- Having retreated about 0.3 mm from the tip of the needle, we begin to wind the cotton thread, forming a ball.
- In a saucer or shallow bowl pour the coloring matter of the desired shade.
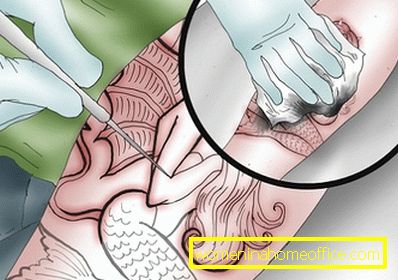
- Next, we dip the needle to the level of the thread in the paint and begin to apply a tattoo with dotted movements along the contour lines.
- This imaging technique involves shallow skin puncturing.

- We continue to apply the tattoo, eliminating an excessive amount of paint with a cotton disc or a cloth cut.
- At the end of the work all materials and devices used must be disposed of.
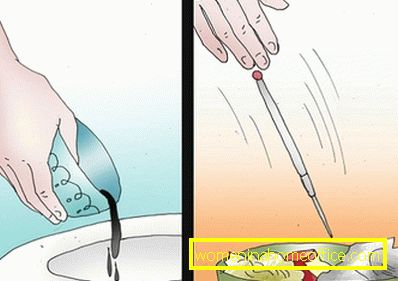
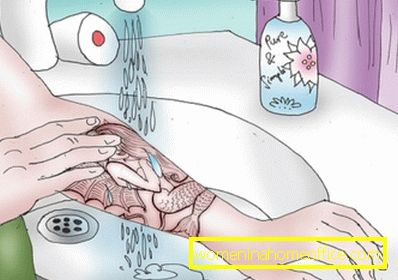
- In conclusion, the site of tattooing is washed abundantly with slightly warm water.
We decorate the body with a temporary tattoo
Suppose you want to decorate your body with an exquisite tattoo for a while. Many girls and boys prefer to put images on open areas of the body during the beach season. Why not use a pen or permanent marker? Now you will learn how to make a tattoo at home with a pen. For these purposes, it is better to choose a writing object with a gel filler, and draw the outline with a thickened core.
Necessary materials:
- gel pens;
- permanent marker of the corresponding color;
- hair spray;
- talc;
- translation.
Step-by-step process description:
- We start with the treatment and disinfection of the skin.
- Next, using the translation, apply the image with a pen with a thin rod.
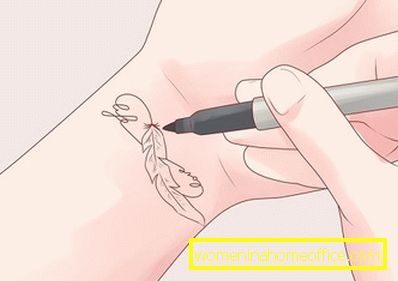
- Contour lines are drawn with a marker, and inside the tattoo we color it with the pen of the desired color.
- The finished image sprinkled with talcum powder.

- We eliminate the remnants of talc with a cloth cut and apply fixing varnish on top.
- Here is such an original tattoo will appear on your body.

Mehendi - Oriental decoration
Many of the weaker sex admire the beautiful ethnic patterns on various parts of the body of Eastern women with admiration. To create such an image, called in the practice of mendi or mehendi, you can independently. To do this, you should know how to make a tattoo with henna at home.
In order for such a tattoo to last longer, you need to properly dilute the coloring matter. Henna will give the skin a reddish or brownish tint. If you want the picture to be darker, add some basma. Also note that henna is best diluted with freshly squeezed lemon juice, rather than water.
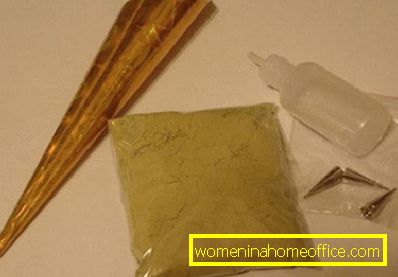
Necessary materials:
- henna powder;
- granulated sugar;
- freshly squeezed lemon juice - ¼ st .;
- syringe or conical bag;
- screen blank.
Step-by-step process description:
- When creating mehendi, it is the preparation of the coloring matter that takes the most time.
- So, we will prepare all the necessary materials.
- In a separate bowl sift 1 tbsp. l henna and diluted with freshly squeezed lemon juice.
- The consistency of the mixture should resemble puree.
- We pack the dye into a plastic bag and leave it in a warm place for 12 hours.
- Then add sugar and, if desired, 1 tsp. any essential oil extract.
- Gradually add more freshly squeezed lemon juice. The finished dye should resemble toothpaste in texture.
- Now draw a stencil. You can also use the finished translation.
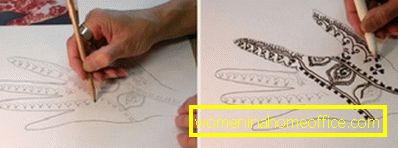
- We transfer the stencil to the selected area of skin and fix it with adhesive tape so that the paint does not flow.
- We spread the paint in a cone-shaped package or a syringe and apply it in the holes of the stencil.
- Carefully remove the stencil from your hand.
- Mehendi drying time takes from 2 to 6 hours.
- Periodically drawing can be moistened with a mixture of lemon juice and essential oil extract.
- At first, the mehendi will have a bright shade, but as it dries it will darken.

The tattoo is a modern original and stylish way of self-expression. If you are not ready to decorate your body with such a pattern, make a temporary tattoo. At home, you can apply the original pattern on the skin and get rid of it after 2 weeks. For drawing large-scale patterns using a needle, it is better to contact a qualified craftsman. I wish you success!