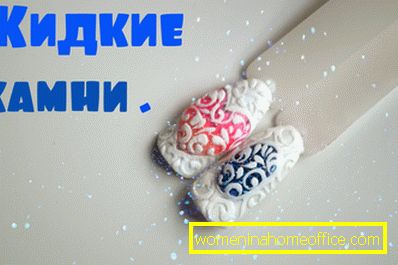
How to make a design liquid stones on the nails
Well-groomed hands - the most important detail of the appearance of a woman. Beautiful manicure indicates a good taste of its owner, causes a positive reaction from others. Among the most popular options for decorating hands stands a technique in which liquid stones are fixed on the nails. Such original nail art will not leave anyone indifferent.
Nail design "liquid stones" involves covering certain areas of the nail plates with convex droplets of polymer gels, imitating precious stones. Shimmering "emeralds", "topaz", "rubies" will make your nails look like jewelry, emphasize the dignity of appearance. Despite the novelty of the design, with the availability of special tools, it can be performed at home.
What you need to imitate the jewels on the nails?

If you want to create artificial pebbles on your nails, get the necessary dyes:
- fixative gel without dispersion;
- artistic gels of different colors;
- black contour not oily gel paint;
- stained gel tone of the selected stone;
- sculptural gel with high density.
In addition to gels, you will need tools to use them:
- natural brush for applying the main layers number 6;
- corner base brush number 6;
- contour brush- "hair" № 2.
To place the stones in a decent frame, buy a tear-off foil of golden or silver color. To simplify the drying process and high-quality hardening of the coating, you can also purchase a special UV lamp. Without the use of ultraviolet rays, you will have to wait long enough after each staining stage until the varnish coat is completely solid.
Best of all, "jewels" look on long nails. So you can first go through the procedure of their extension using acrylic. If you are satisfied with natural marigolds, polish their surface before starting work, otherwise the paints may spread. To develop the necessary skills, first practice on nails that are easy to remove, for example, pasted.
Liquid stones on nails: a master class from professionals
When performing a manicure, fix each layer by placing a finger under the UV lamp for 2 minutes.
- Dip the corner brush into a white gel and proceed to staining the tip of the nail plate, as in French manicure. Then apply a fixative.
- Take a "hair" brush and, having typed a black gel, paint a selected pattern on your nail (for example, a peacock feather, a flower or a brooch) with a picture of a place for a round, square, oval or diamond-shaped stone. On the free space you can draw patterns-frames.
- For the purpose of gilding or silvering, separate from the foil a part slightly larger than the size of the nail. Press the piece with the matte side to the nail plate and sharply tear it off. After applying the foil drying is not required.
- Place for the stone, marked with contour line, cover with yellow and silver tinting gel so that the colors smoothly replace each other.
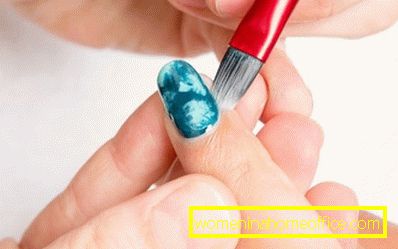
- With a hair brush, apply a stained glass gel that repeats the reflection of the selected stone. For example, an azure color can be placed on an emerald base, red is needed for a ruby, and light brown is for a amber.
- Again using a “hair” brush, gently shape a spherical stone with a transparent gel designed to create volumetric jewelery on the nails. This material has the properties of a magnifying glass, so the stone will begin to sparkle and shimmer with shades of the base.
- To prevent a manicure from spoiling quickly, cover the nails with top gel with a basic brush.
A little creative - and you are irresistible
It is quite possible to move away from the classical design model, in which liquid stones are fixed on the nails. How to make a manicure special, choosing one of the options for making changes in the conventional technique, advised by experienced masters.
- Paint the entire nail with a bright color, with the exception of a semicircle near the cuticle. With this option, the color of the stone should be 1-2 tones brighter than the main coating.
- Make a pale "marble" manicure. In this case, the base color should be a watercolor reflection of the central design.
- To create an evening look, cover the backing of liquid stone with velvet sand.
- When performing patterns, do not be afraid to experiment: change the Eastern ligature with abstractions, graphics, or any other drawings to your liking. In this case, the stones should be very clear.
- Manicure foil is also suitable for making stones.
- The liquid stone can be created in the innovative "Finthene" technique, which, after staining with a tinted gel, gluing the slider to the place of the future stone - it will partially cover the intended area. Then follows the transition to the formation of decorations from sculptural gel.
- It is not necessary to decorate each nail with stones - in order to avoid excessive saturation of the design.
- Color "jewels" should not be too bright. Best of all, if it will be combined with the eyes of a girl.
- To make liquid stones look good on small nails, “scatter” fine “turquoise” or “pearls” over them.
- This type of manicure looks great on the nails, repeating the outlines of the stone.
Liquid stones on the nails - one of the most beautiful modern types of nail art. In order to surprise your friends with an unusual convex-shaped manicure, it is not necessary to visit a beauty salon and sign up for expensive procedures. Use the necessary set of brushes and paints, call for help a little artistic taste - and the works of art on your nails are ready.